- Commissioning
- Connect devices
- Non-compatible inverters
Non-compatible inverters
This page describes the integration of non-compatible inverters into the energy monitoring system using separate energy meters.
Table of contents
Compatibility
Depending on the Manager hardware used, different meter types can be used to record power.
There are also differences in the number of meters to be configured as inverter replacements.
| Meter type | Number of meters that can be used as inverter replacements | |
|---|---|---|
| EnergyManager pro | Manager flex | |
| S0 meter* | 2 | 1 |
| Shelly Pro 3EM | any | cannot be used as inverter replacement |
*) Power meter with S0 output
Connection of S0 meter to Manager flex
Interface: S0 input
Wiring diagram
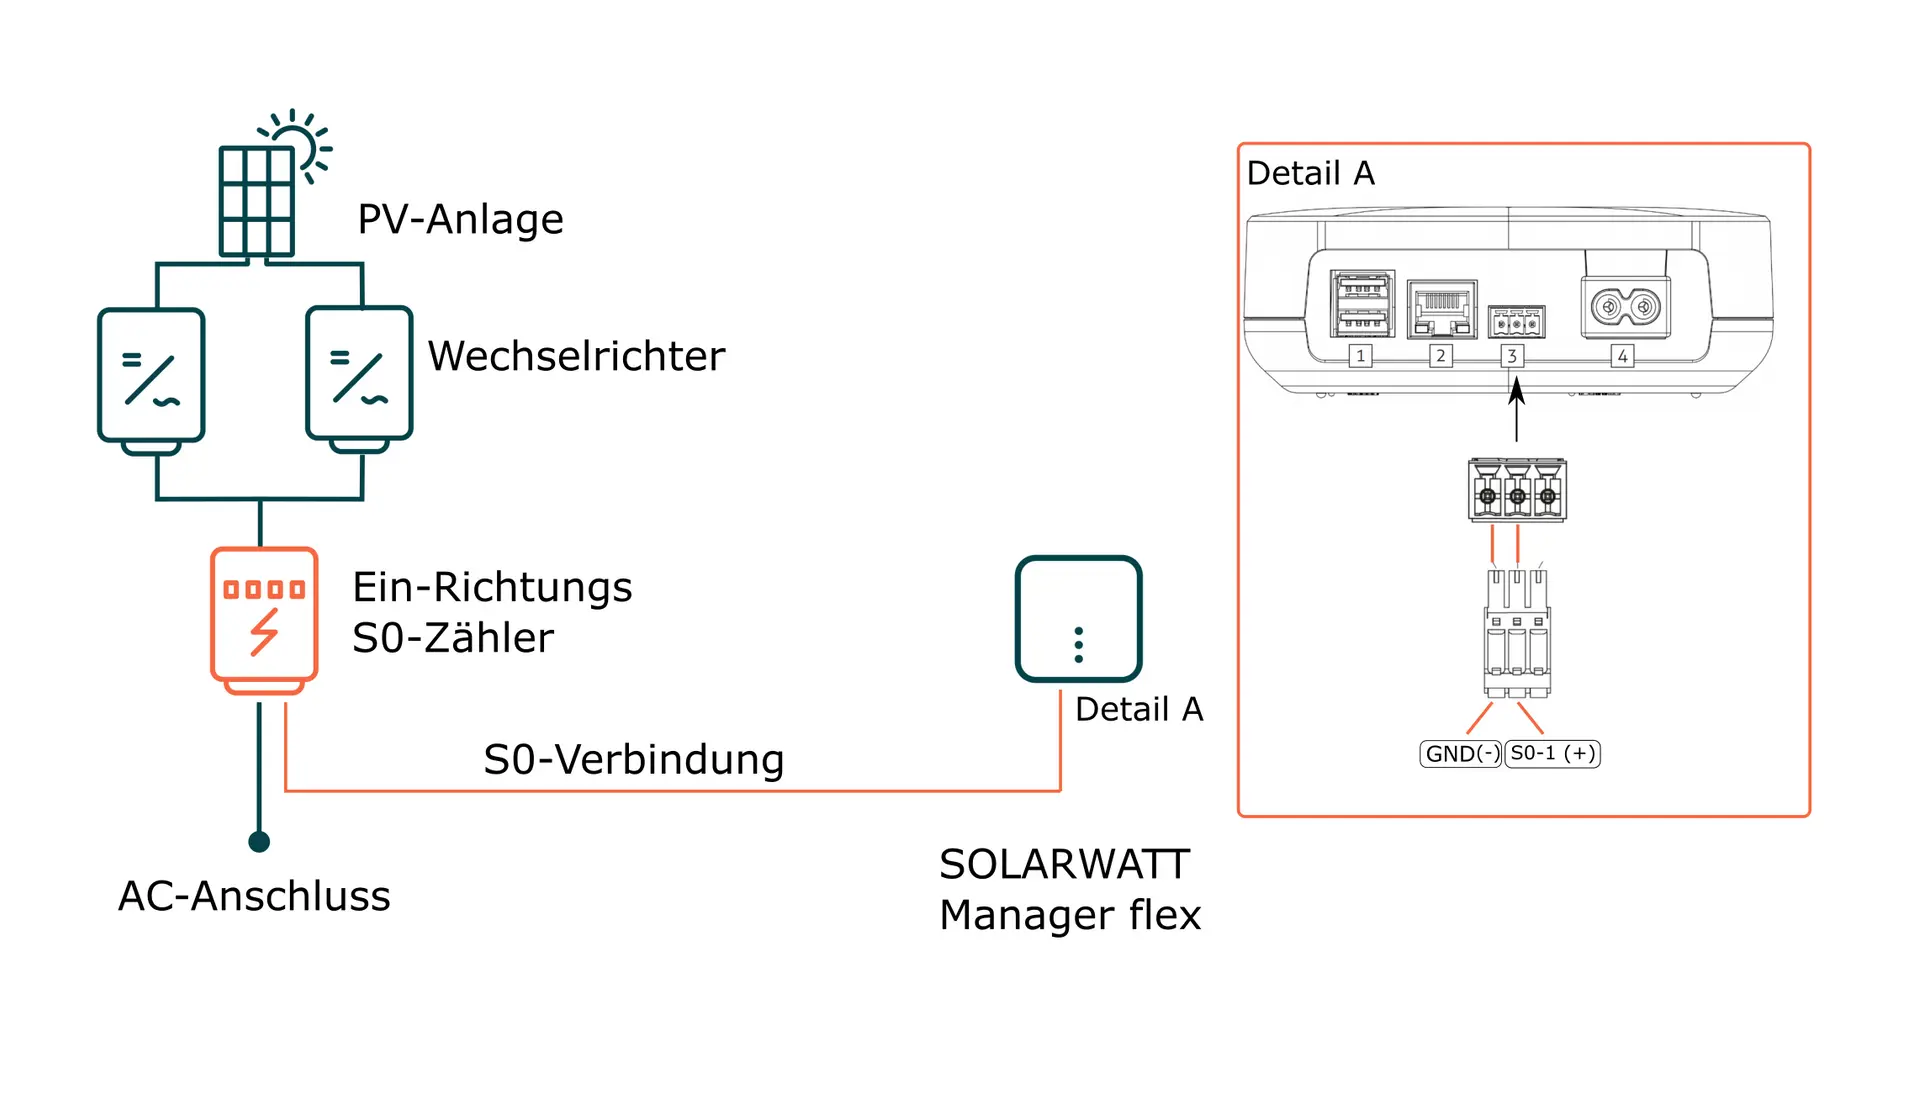
Installation instructions
- Before connecting the meter to the Manager flex, check the wiring on the meter side.
- Ensure that there is no disconnect and check it.
- Connect the energy meter to the feed line of the inverter. Ensure the correct connection direction (current flow direction) on the energy meter.
- Connect the cable for S0 pulse transmission to the S0 connector (included in the scope of delivery). Ensure that the polarity is correct as shown in the illustration above.
- The Manager flex provides several S0 interfaces. Make a note of which interface you have connected the meter to.
- Make a note of the pulse rate of the S0 meter (imp/kWh).
- Connect the cable for S0 pulse transmission to the pulse output of the energy meter.
- Connect the S0 plug to the S0 socket on the Manager flex.
- Restore the power supply.
SOLARWATT EnergyMeter
Single-direction S0 meter with backstop
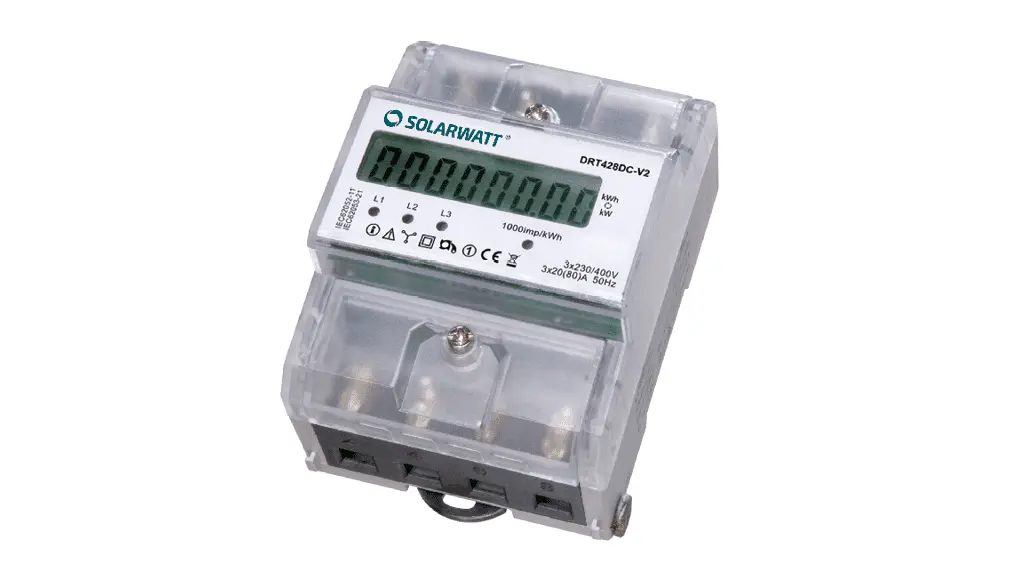
General information
Interface: S0
Supply voltage: 3 x 230 V/400 V
AC Nominal current/limit current: 20 A / 80 A
Communication: S0 (1000 imp/kWh); S0 pulse length: 90 ms
Applicable documents
Pin assignment
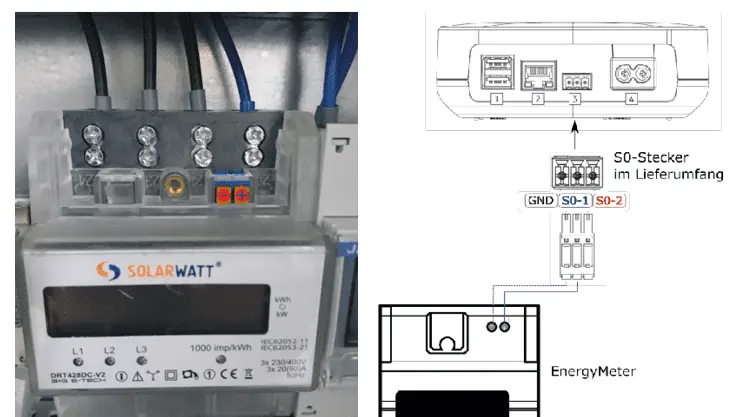
Connection of S0 meter to Energy Manager pro
Interface: S0 input
Pin assignment
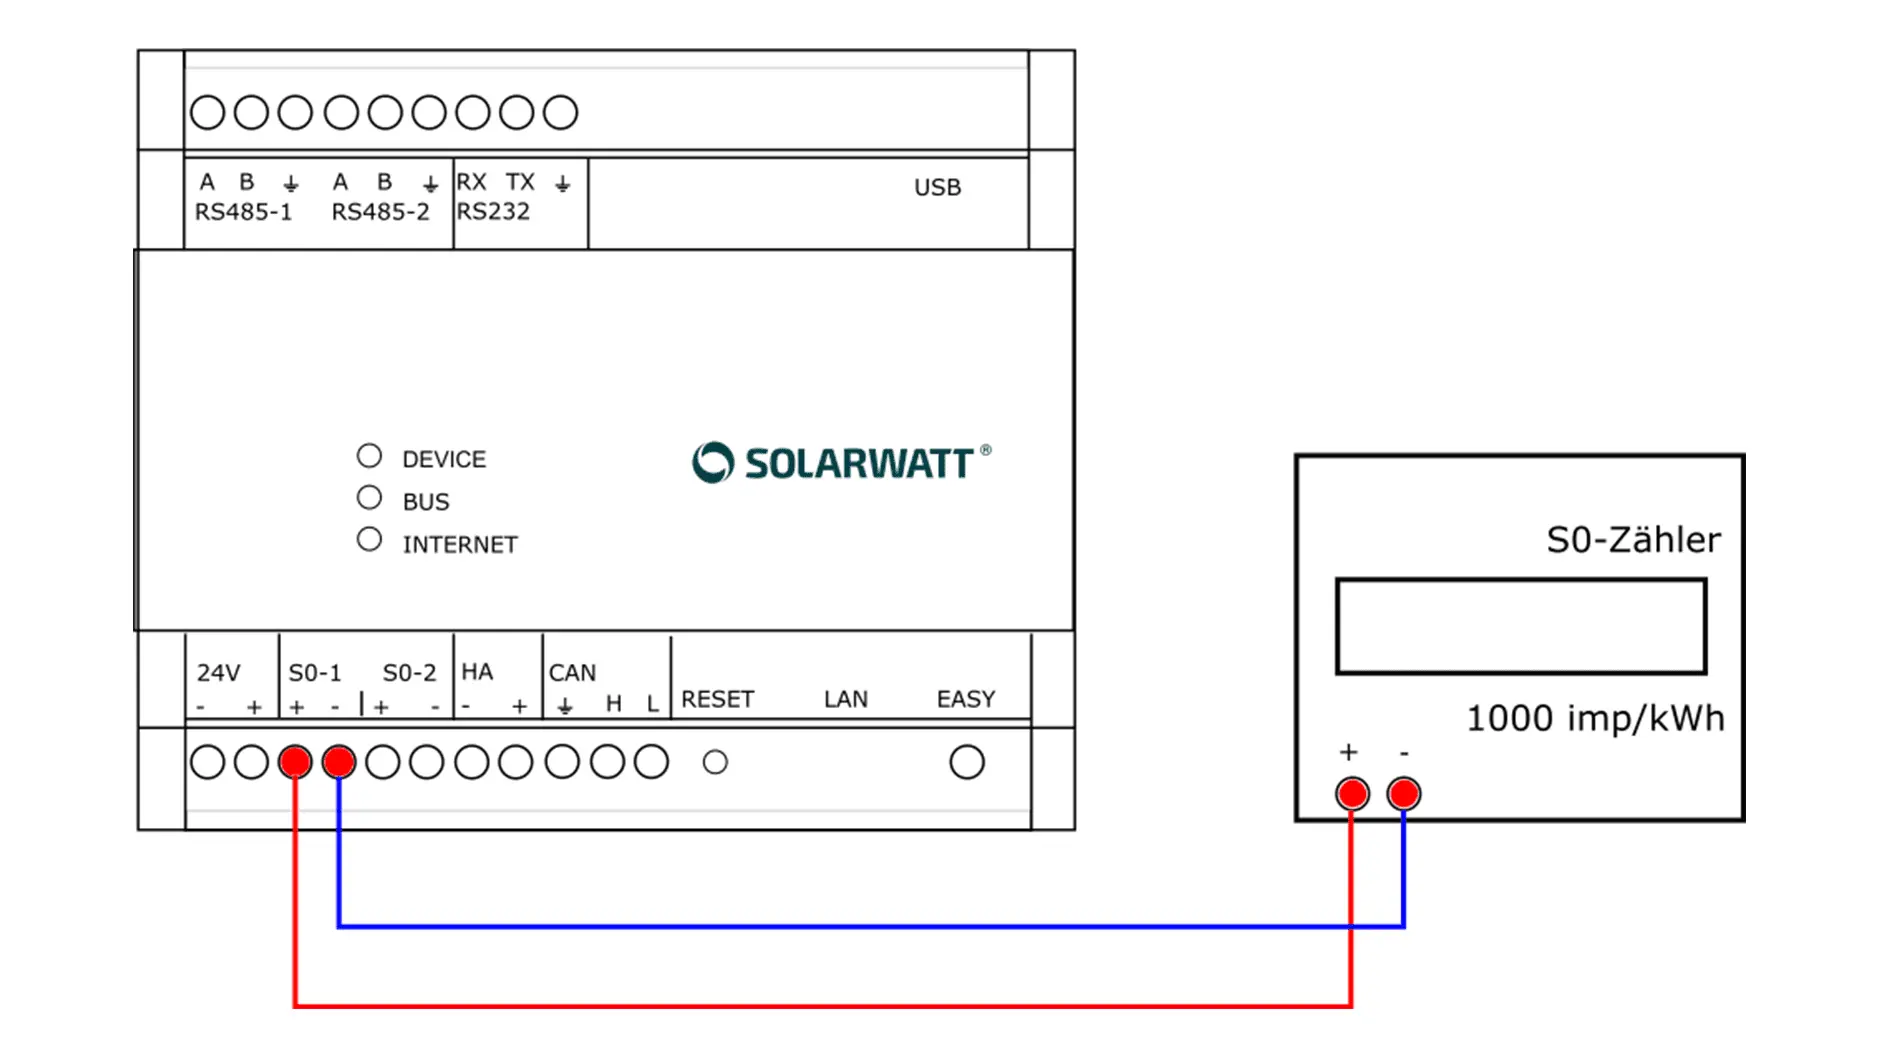
Installation instructions
- Establish and check the disconnect.
- Connect the connections (S0+ and S0-) of the S0 meter to the S0 connection terminals on the EnergyManager pro. Ensure correct polarity (S0+ and S0-).
- The EnergyManager provides several S0 interfaces. Make a note of which interface you have connected the meter to.
- Note the pulse rate of the S0 meter (imp/kWh).
- Restore the power supply.
Installation Shelly Pro 3EM
Interface: Ethernet or WLAN
Installation instructions
The Shelly Pro 3EM can be used to record the inverter power on the EnergyManager Pro. Installation instructions can be found under Shelly Pro 3EM.
Device search in SmartSetup
- Starting the SmartSetup
Certain device types are found and installed automatically (Automatic installation).
Other device types are installed by selecting the device driver and specifying the IP address or host name (Manual installation).
Information on the installation types of the series can be found in the table at the end of this page.
Automatic installation
If the device is correctly configured and available in the network, it is automatically displayed in green in the device list.
- If necessary, connect additional devices
- Continue with SmartSetup PV systems
Manual installation
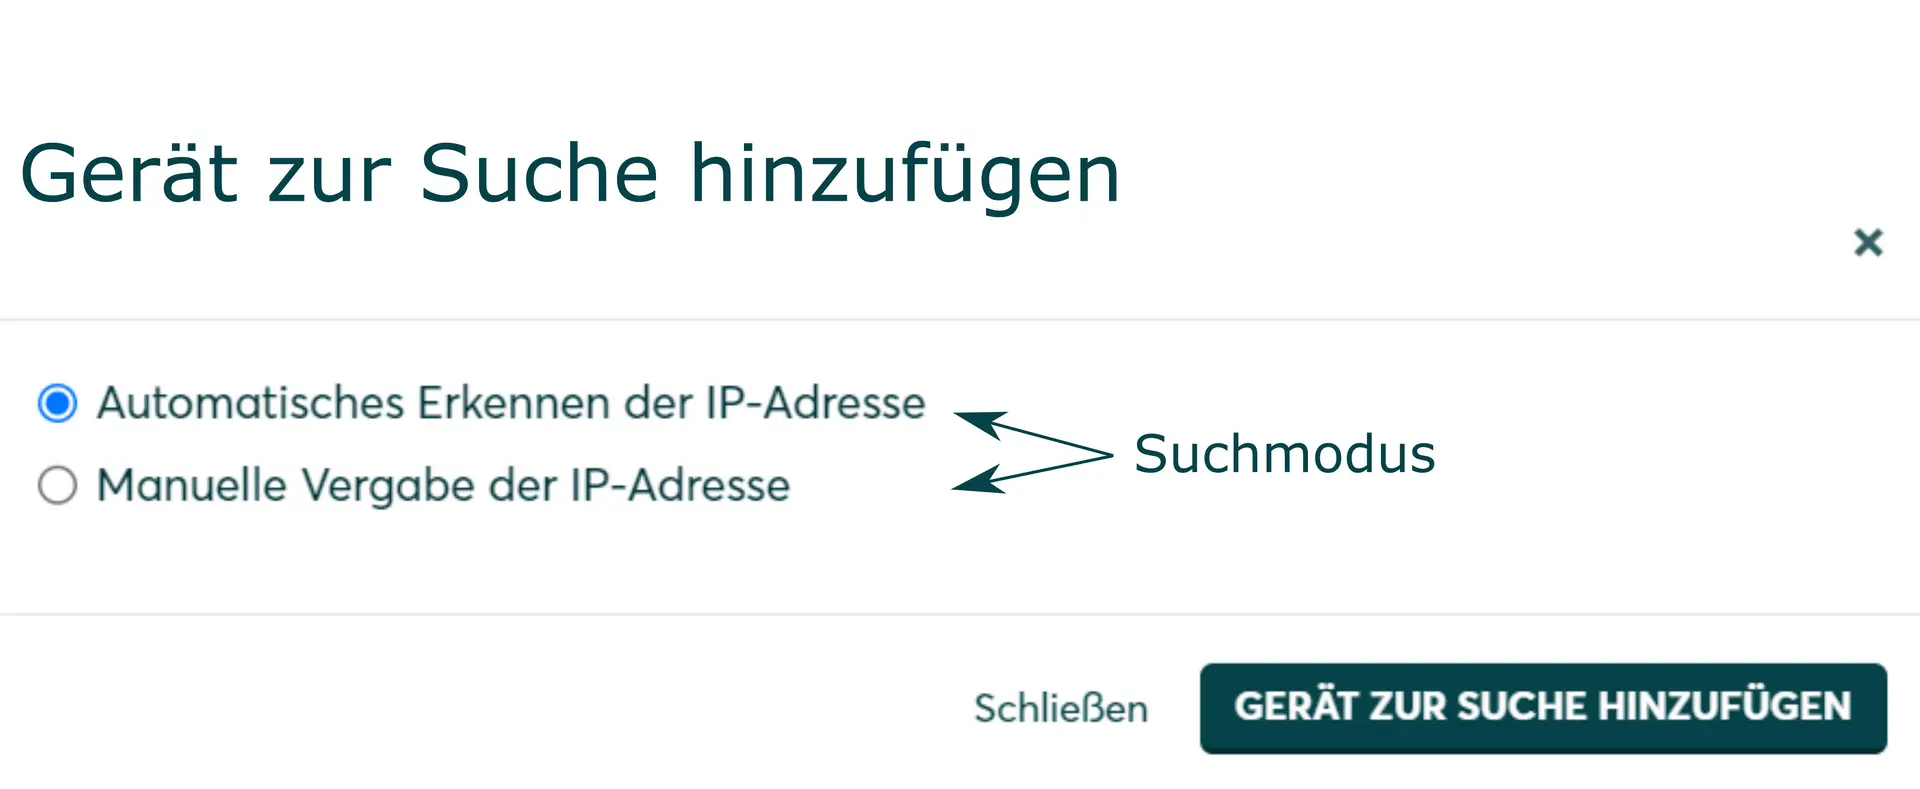
- In the Select devices drop-down menu, select or search for the appropriate driver (according to the table at the bottom of the page) for the device.

- Select the search mode (according to the table at the bottom of the page) for the device.
- If required, enter the IP address or host name of the device and confirm with Add device to search.
- If necessary, add further devices to the search.
- When the search list is complete, click Search and install devices.
Correctly installed devices appear in the device list with the message: Device is installed. The list also shows the current generation data.
| energyManager pro | Manager flex | ||||
|---|---|---|---|---|---|
| Driver | Search mode | Driver | Search mode | ||
| S0 counter | S0 counter | Specification of the interface and the pulse rate | S0 counter | Specification of the interface and pulse rate | |
| Shelly Pro 3EM | Shelly (Allterco Robotics) | Manual start of device search without specifying IP address * | Device not supported as inverter replacement | ||
*) Shelly devices are found after starting the device search without specifying an IP address. If the IP address of the Shelly is subsequently changed, the connection is lost and a new device search is required. It is therefore recommended that Shelly devices are assigned an unchangeable IP address.
Further information on assigning IP addresses can be found here: Device connections via network
Selected articles: