- Commissioning
- Connect devices
- SG Ready heat pump
SG Ready heat pump
This page describes the connection of an SG Ready heat pump via a Shelly 3EM or via a coupling relay to the SOLARWATT Manager.
Compatibility
| Manager flex 1.0 / flex 1.5 / rail | |
|---|---|
| Connection option SG Ready heat pump | 1-phase SG Ready heat pump: via Shelly 1 Mini Gen 3 and Shelly PM Mini Gen3 3-phase SG Ready heat pump: via Shelly 1 Mini Gen3 and Shelly Pro 3EM |
Information on the SG Ready interface
Functionality
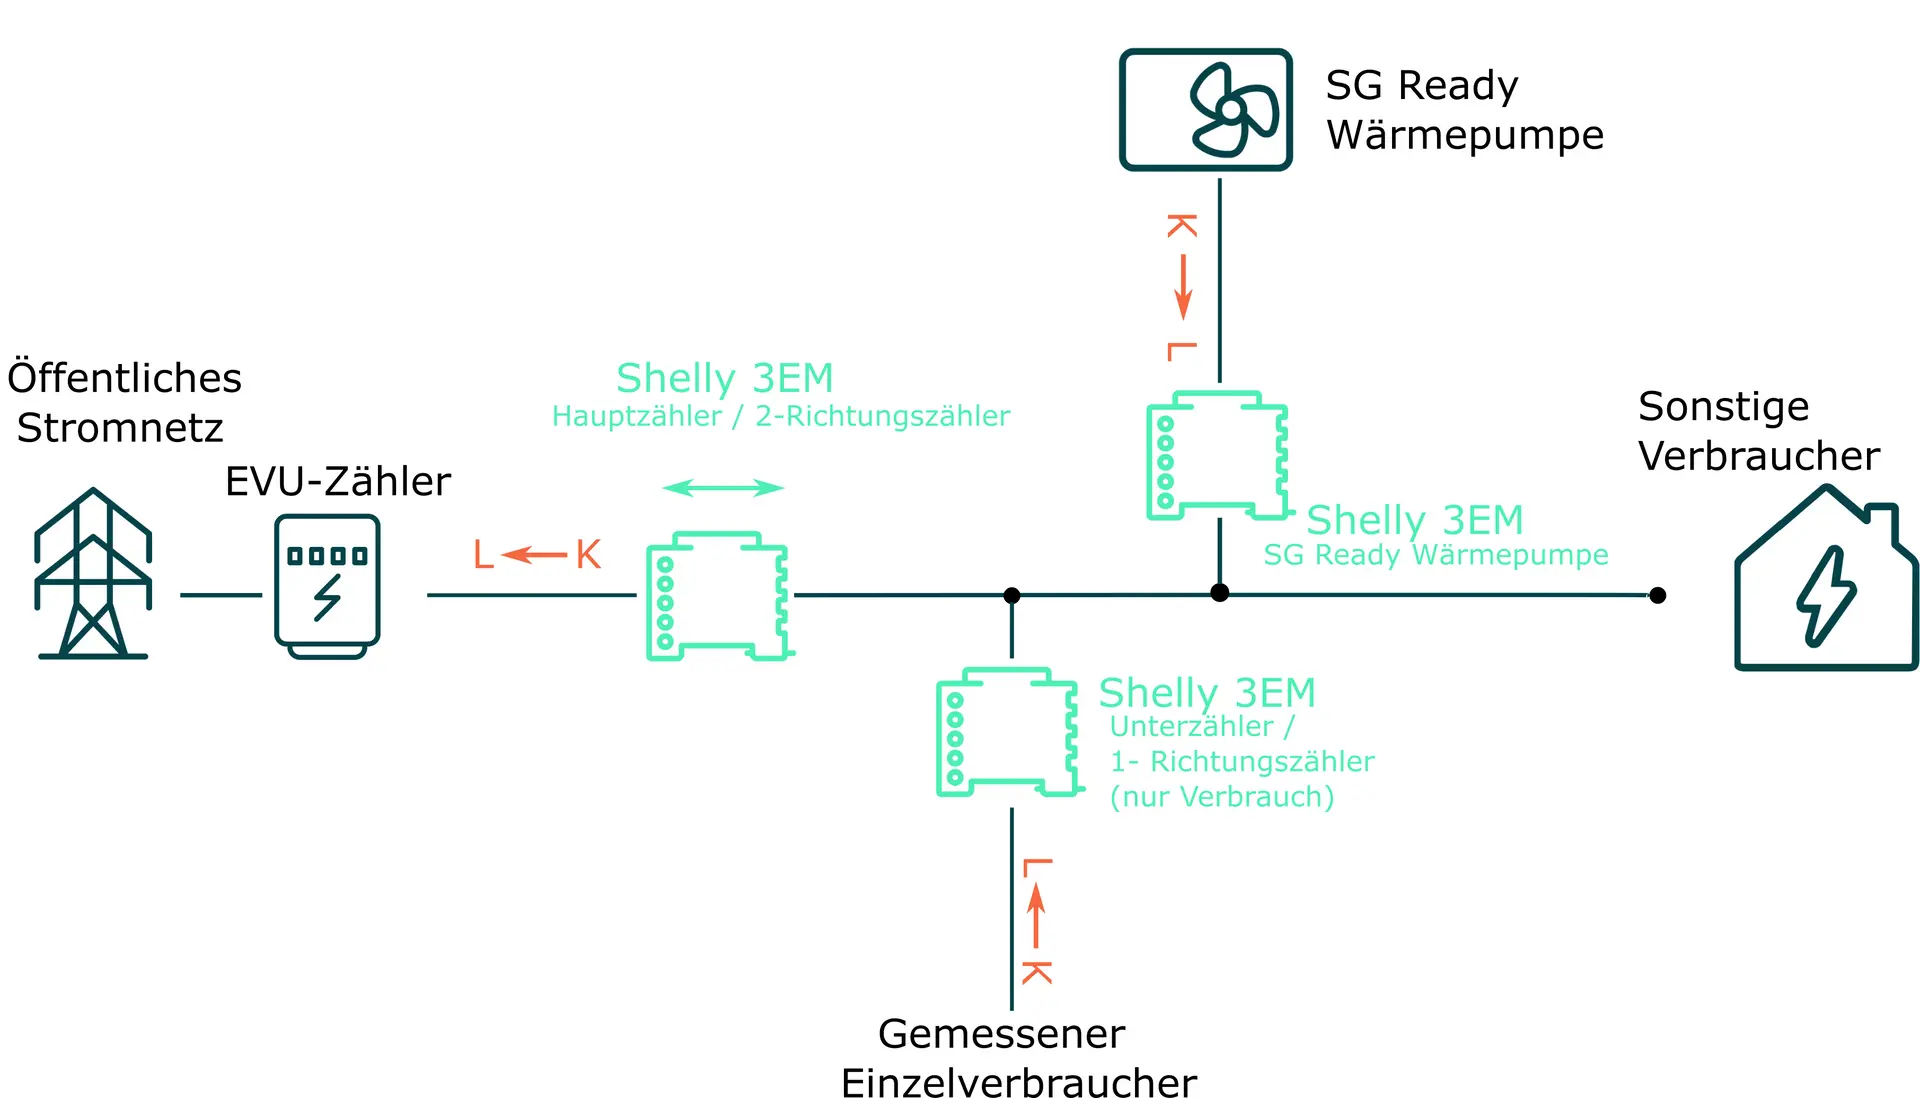
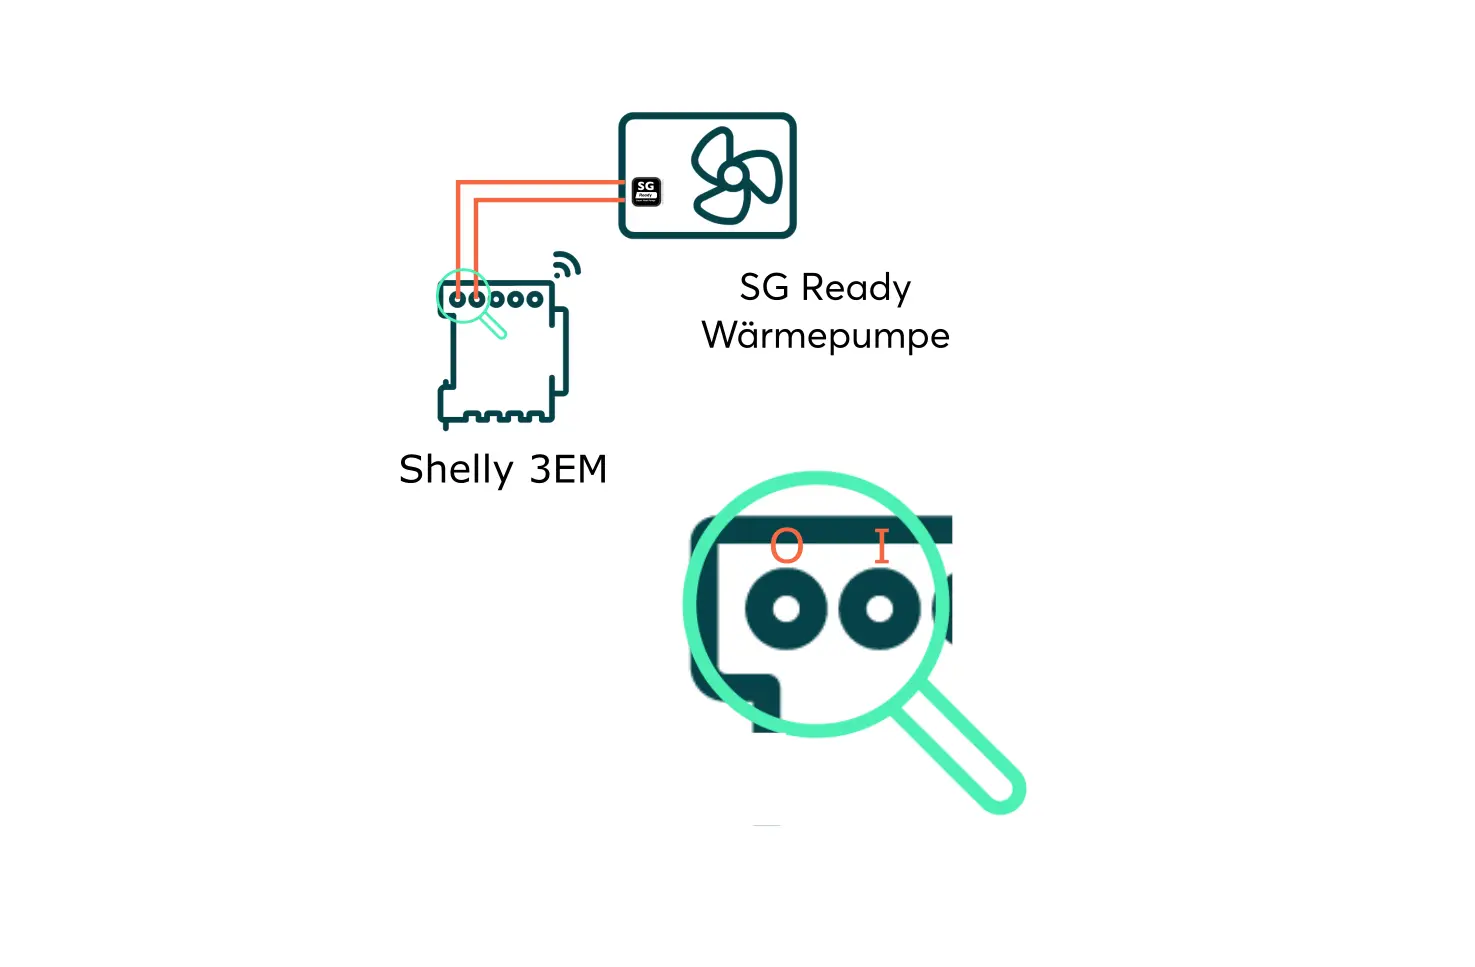
The SOLARWATT Manager calculates the current PV surplus power (grid feed-in). If a (freely definable) value of excess PV power is reached, a potential-free contact (coupling relay or O/I output of the Shelly 3EM) is switched, which activates the SG Ready interface of the heat pump and thus triggers the operating states according to 1-4.
Interface assignment
- the SG Ready interface consists of 2 inputs (terminals)
- Inputs can be switched via a potential-free contact
- this allows the following operating states of the heat pump to be realized:
| Terminal 1 | Terminal 2 | ||
|---|---|---|---|
| Operating state 1 | On | Off | Switch off heat pump (max. 2h) |
| Operating state 2 | Off | Off | Normal operation |
| Operating status 3 | Off | On | Start-up recommendation for boosted operation (internal controller decides) |
| Operating state 4 | On | On | Start-up command Variant 1: Switching on the heat pump Variant 2: Higher setpoint temperature or use of heating element |
Note
For information on the technical design of the SG-Ready interface, please refer to the heat pump manufacturer's Installation instructions. Operating state 3 is selected as standard for PV Optimization operation. The heat pump is operated independently by the heat pump controller. Triggering operating state 3 does not necessarily result in the heat pump starting up.
Shelly 1 Mini and Shelly PM Mini for recording the SG Ready heat pump
Number of connectable SG Ready heat pumps: 1
Interface: WI-FI
Applicable documents
- Install the SG Ready heat pump in accordance with the heat pump manufacturer's Installation instructions.
- Configure the control of the SG Ready heat pump in accordance with the heat pump manufacturer's Installation instructions.
- Install the Shelly 3EM so that the electrical power consumption of the heat pump is measured. Observe the manufacturer's Installation instructions.
- Observe the installation direction of the current transformer terminals (see illustration below)
- Connect the potential free outputs of the Shelly 3EM to the SG Ready interface of the heat pump
- Information on the technical connection of the Shelly 3EM relay to the SG Ready interface of the heat pump can be found in the heat pump manufacturer's Installation instructions.
Setup in SmartSetup
- Start the Smart Setup
Search for devices
- Select Shelly in the Select or search for devices search field.
- Enter the complete host name or the IP address of the Shelly. You can find the host name in the Shelly user interface, in the router user interface or using an IP scanner (note: a network scan requires the prior consent of your customer). Confirm Add device to search.
- Click on Add device to search.
- If necessary, add further devices (inverters, battery storage, etc.) to the search. You can find instructions on connecting additional devices under Connecting devices.
- Click on Search and install devices.
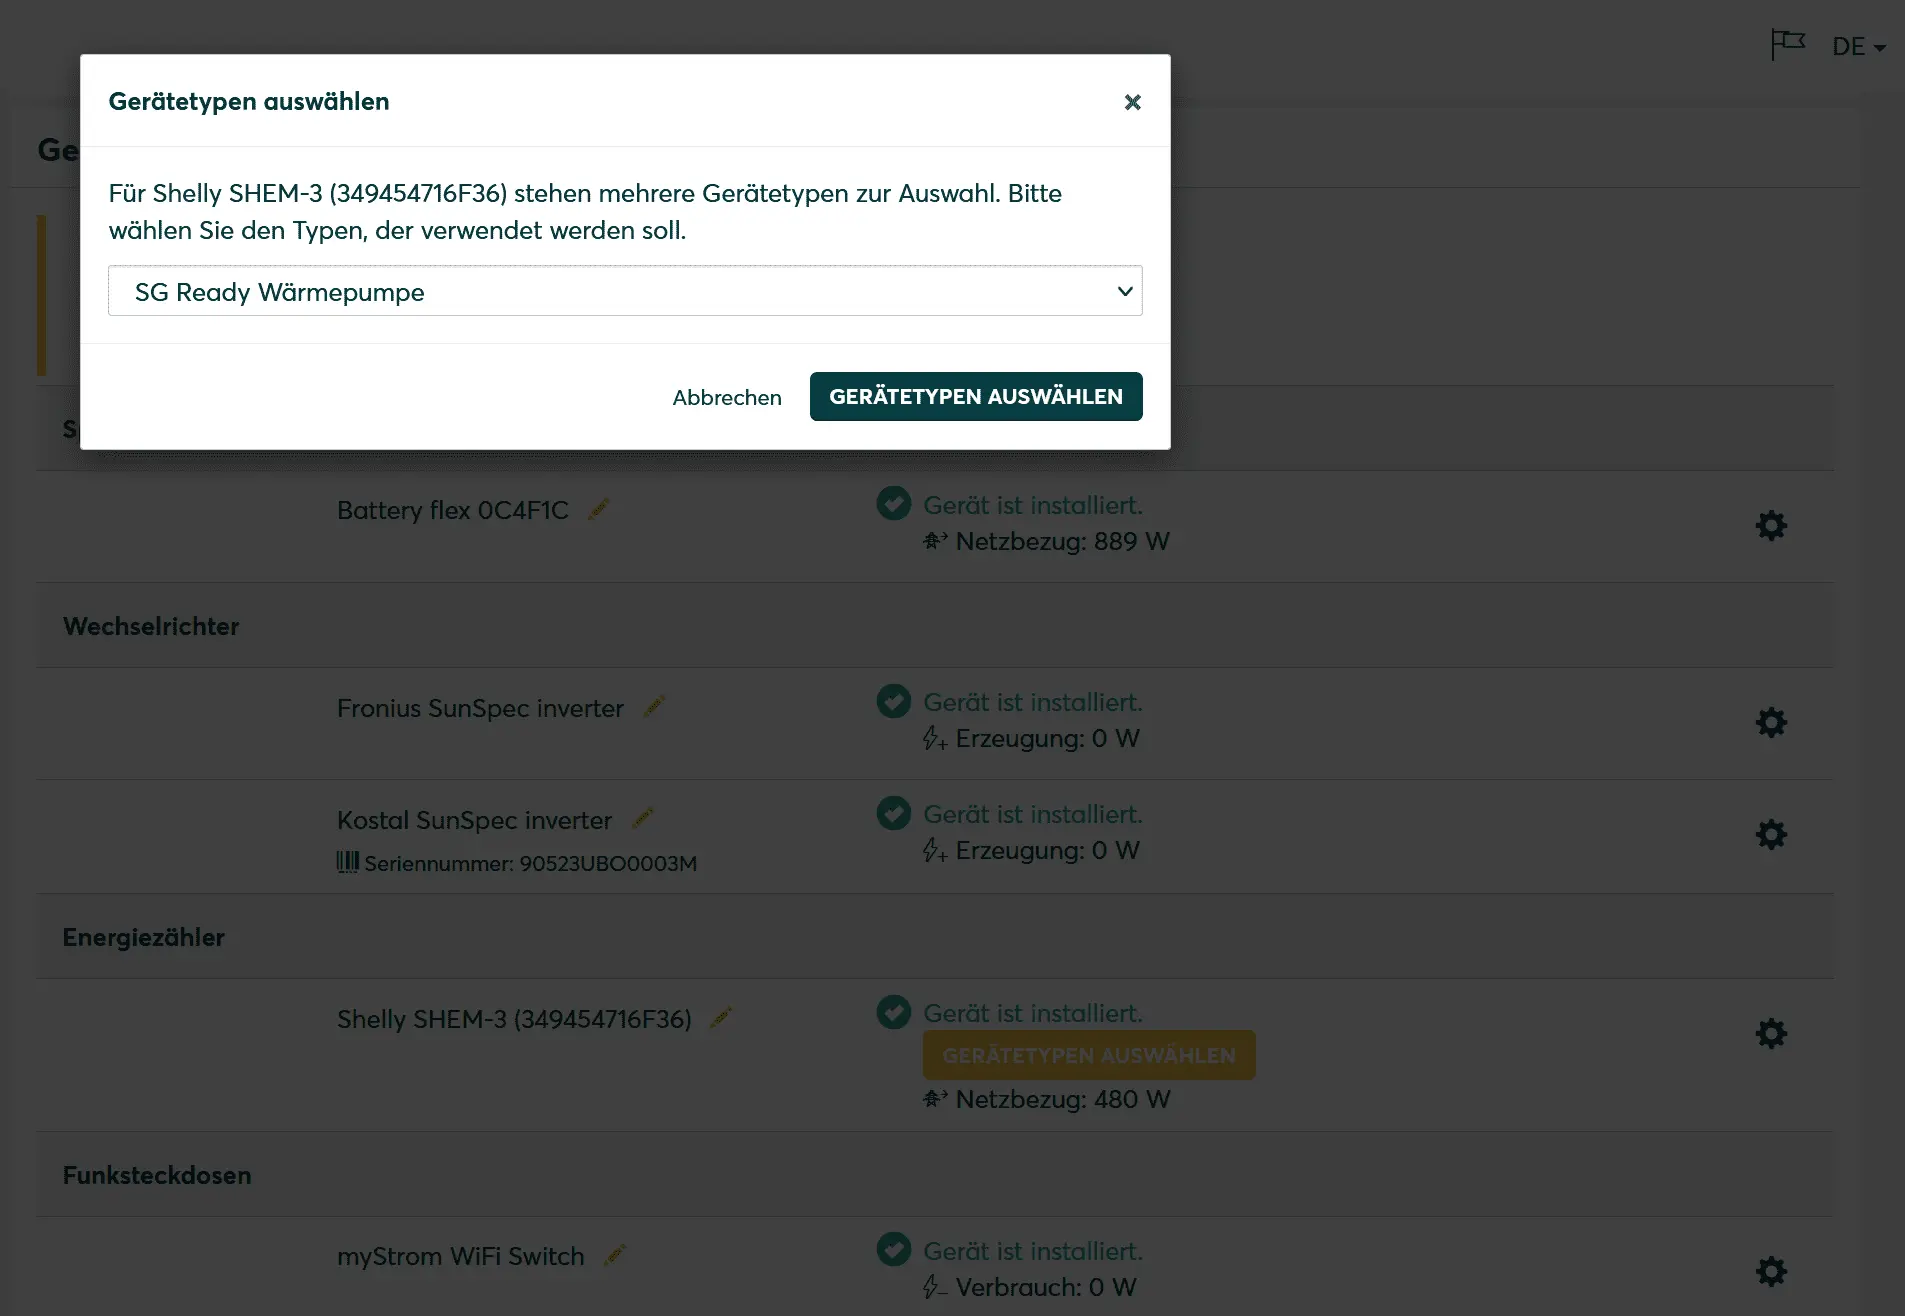
- After successful installation, the Shelly meter appears under Energy meter and Shelly Device under Other devices.
- Configure the Shelly meter by clicking on Select device type (field highlighted in yellow).
- Configure the Shelly meter as device type: SG Ready heat pump.
- Confirm the entry by clicking Select device type.
PV optimization settings
Additional settings are required to operate the device with a maximum proportion of solar power (PV optimization).
The settings for PV optimization are made in the SOLARWATT Manager portal under Optimization.
Selected articles:


