- Home
- SOLARWATT Charger vision
- Commissioning
Commissioning
This chapter describes the commissioning and configuration process for Charger vision.
Switching on/off
- The charger is turned on/off at the fuse
- After being switched on at the fuse, the charger will be ready for operation after approx. 30 seconds.
First-time startup
After switching the charger on, it will be ready for operation after the status LED flashes green.
By default, an RFID card is required to use the charger. Once a vehicle is plugged in, the charger will only begin delivering power to the vehicle after completing authentication by tapping one of the two RFID cards included in the box against the front surface of the charger.
By default, the charger won't be connected to the SOLARWATT Manager. The maximum current is set at the factory to 32 A (7.3 kW for single phase chargers) or 16 A (11 kW for three-phase chargers). The car will begin charging (after successful authorization) with the maximum possible charging power.
Default settings
| Maximum current | 16 A | 11 kW / three-phase chargers |
| 32 A | 7.3 kW / single-phase chargers | |
| Charging mode | Controlled | RFID authorization is required to start charging. Please note that when the charger is connected to the SOLARWATT Manager, RFID authentication is not required to start a PV-optimised charging session. |
| Load balancing switch | OFF | Dynamic load management deactivated. |
| Network type | LAN | The charger will try and connect to the internet using a wired LAN (Ethernet) connection. |
| Cloud communication | OFF | The Charger does not send any data to the cloud. Remote support is not possible. |
Configuration
The Charger vision is configured via the SOLARWATT Pro app. The connector to the Charger is via Bluetooth, configuration with the SOLARWATT Pro app can only be carried out locally. No charging process may take place during configuration (the electric car must be unplugged).
If cloud communication has been activated for the charger, Solarwatt can configure the charger remotely via the cloud.
The following parameters can be configured:
| Maximum current | 6 - 32 A | Max charging current per phase. The max for 3-phase chargers is 16 A and 32 A for single phase. |
| Charging mode | Controlled | RFID authorization is required to start charging.Please note that when the charger is connected to the SOLARWATT Manager, RFID authentication is not required to start a PV-optimised charging session. (default) |
| Plug and play | No RFID authorization is required to start charging. Charging will begin immediately as soon as an electric car is plugged in. | |
| Lock mode | The charger is disabled and will not charge any plugged in vehicles. Must be activated or deactivated again via the SOLARWATT Pro app. | |
| Load balancing switch | ON | Dynamic load management active (charger must be wired to the Inverter vision CHINT meter). |
| OFF | Dynamic load management deactivated. (default) | |
| Network type | LAN | The charger will try and connect to the internet using a wired LAN (Ethernet) connection. (default) |
| Wi-Fi | The charger will try and connect to the internet using a wireless Wi-Fi connection. | |
| Cloud communication | ON | The Charger does not send any data to the cloud. Remote support is not possible. (default) |
| OFF | The Charger does not send any data to the cloud. Remote support is not possible. |
SOLARWATT Pro app
The charger must be switched on for configuration. No charging process may take place during configuration (no electric car should be plugged in). The connection to the charger is established via Bluetooth; the mobile device with the SOLARWATT Pro app must be within Bluetooth range. The SOLARWATT Pro app automatically displays all available nearby chargers by their serial number.
- Switch on the charger
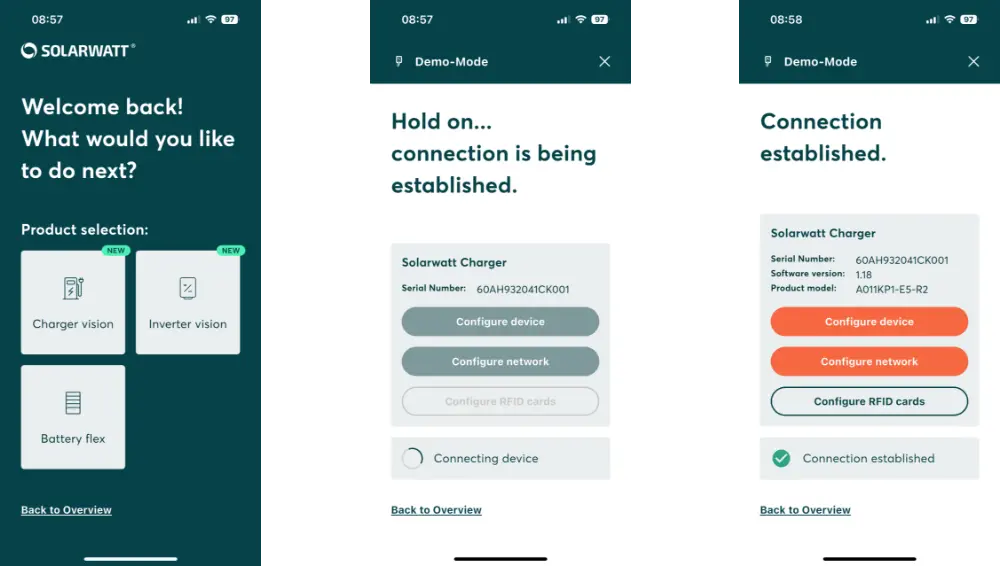
- Open the SOLARWATT Pro app and select "Charger vision"
- Select the charger to be configured (using the serial number)
- Start configuration Press "Configure device"
Charger Configuration
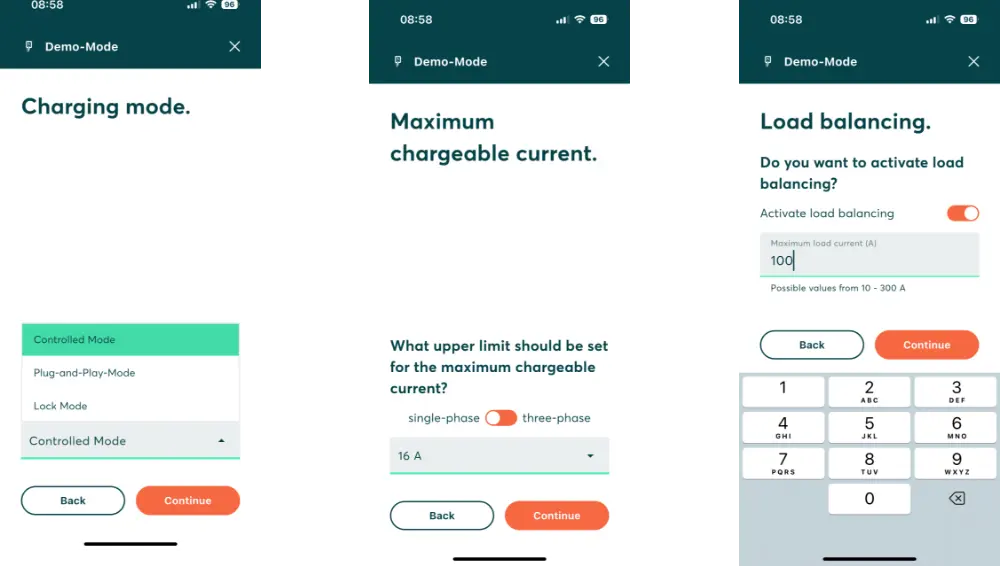
- Set the charging mode (see table above for what each mode means)
- Set maximum charging current (in ampere steps)
- Optional: Activate dynamic load management and set the max. load current
Managing Network Settings / Wi-Fi
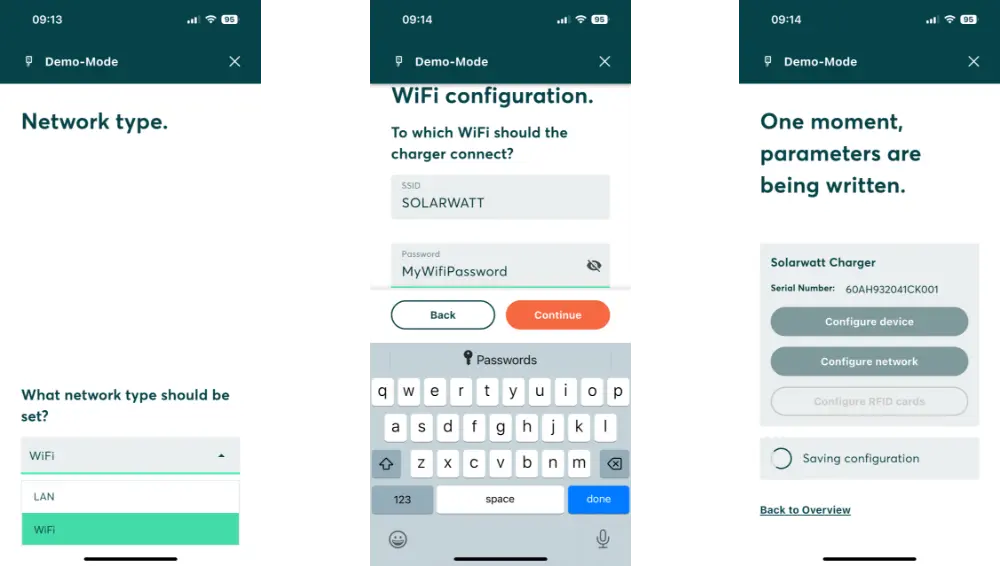
- Selection of the LAN / WiFi network connection
- Optional: Connect the Charger to Wi-Fi
The WiFi name and WiFi password are required to connect to the local WiFi. A connection via LAN is recommended for a stable network connection.
Managing RFID Cards
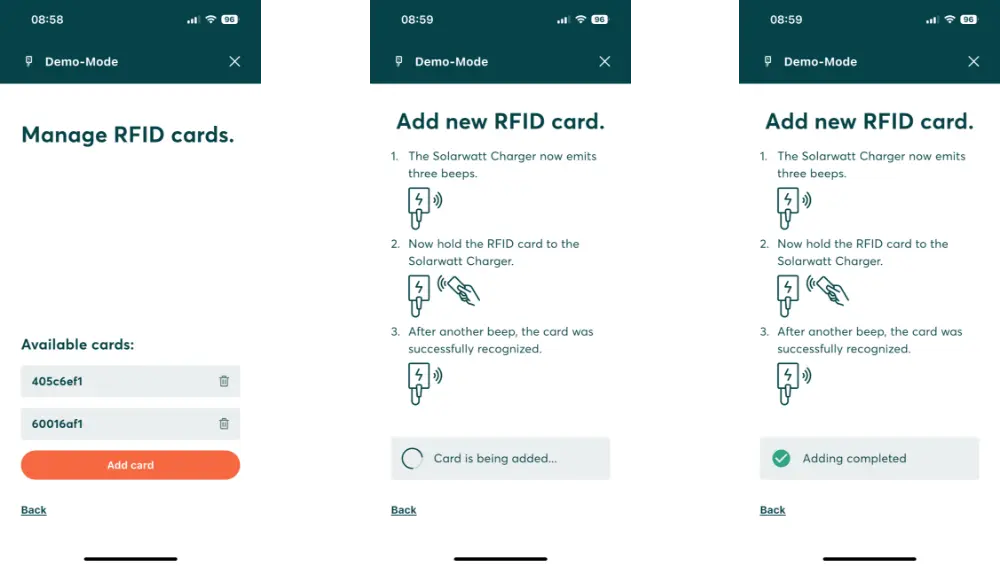
- Manage optional RFID cards and add additional RFID cards
- The two RFID cards included in the charger's box will already be added
SOLARWATT Manager connection
After successful commissioning and connection of the Charger to the customer's internet router access point, the Charger can be connected to the customer's SOLARWATT Manager / Home app through the EM.Setup process.
Instructions for connecting the charger to the SOLARWATT Manager can be found here.


