- SOLARWATT Battery & Inverter vision
- Installation
- Installing an Inverter vision three cluster
Installing an Inverter vision three cluster
This page describes how to set up an energy system with several Inverter vision three devices. The Battery vision clusterbox enables the inverters to be operated together.
Installing the inverters
- Installing the inverter devices according to the Installation instructions
- ATTENTION: the step connecting communication to the meter is not required for the individual devices
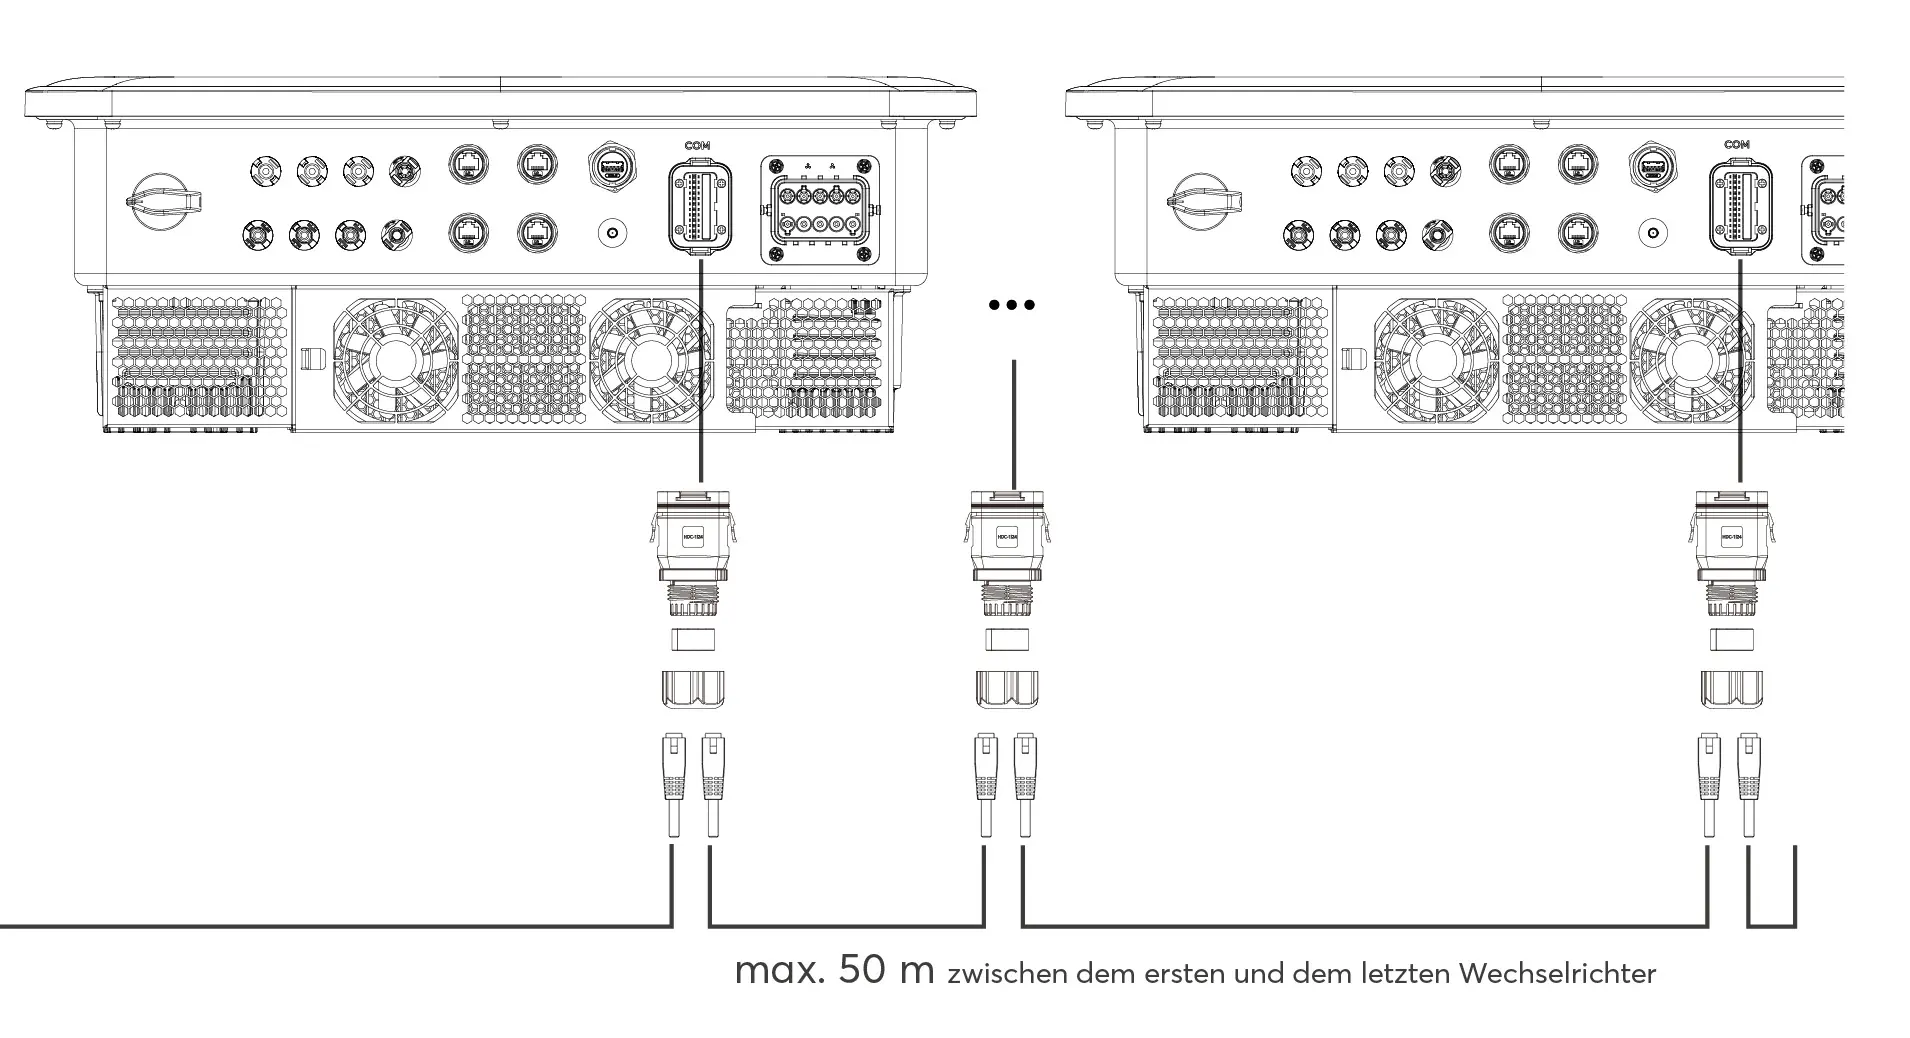
- Max. Observe maximum distance of 50 m between first and last inverter
- Do not put the inverter devices into operation yet!
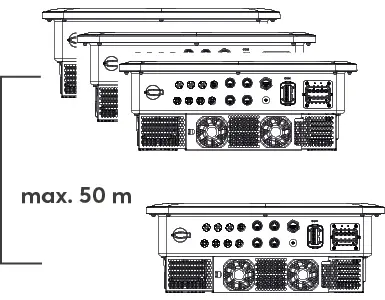
Max. Distance between first and last inverter
Mounting the cluster box
Observe all Safety Instructions and requirements for the installer.
Observe the Specifications for the installation location and the maximum and minimum installation distances for the clusterbox.
Observe the specifications for additional accessories required for the clusterbox installation.
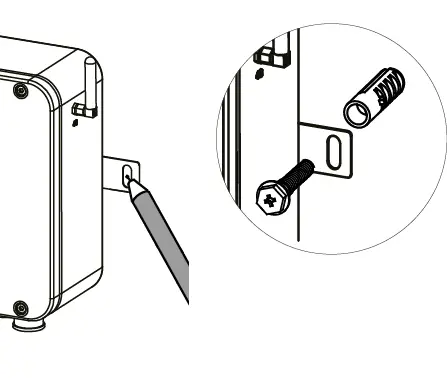
- Mark the fixing points
- Fasten the cluster box with screws
Installation of the cluster system
Please note the Information on cable requirements for the communication connections between the devices.
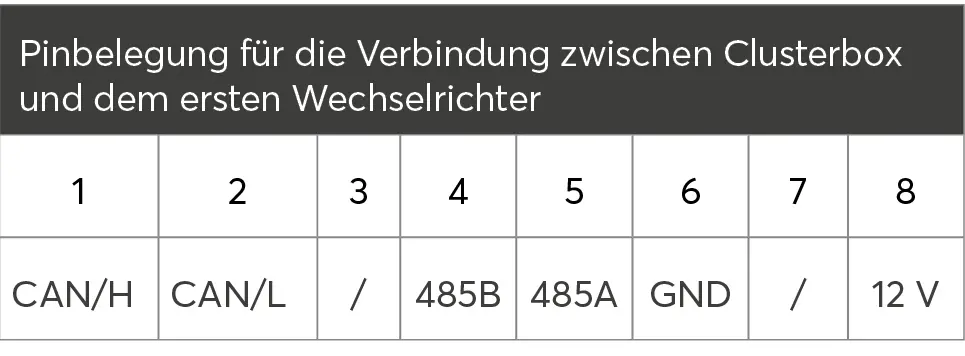
- Connect the communication cable to the inverter output of the Clusterbox and connect it to the first inverter
- To protect the connection in wet room and outdoor installations, use the connector housings included in the scope of delivery
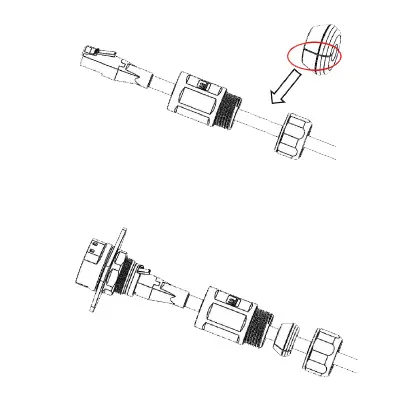
Note: When using an installation cable, it may not be possible to fit self-assembled plugs through the plug housing. In this case, make sure that the plugs used are UV and weather-resistant for outdoor use and that the required IP rating IP65 is maintained.
- Connecting communication between the inverters
- Do not start the inverters yet!
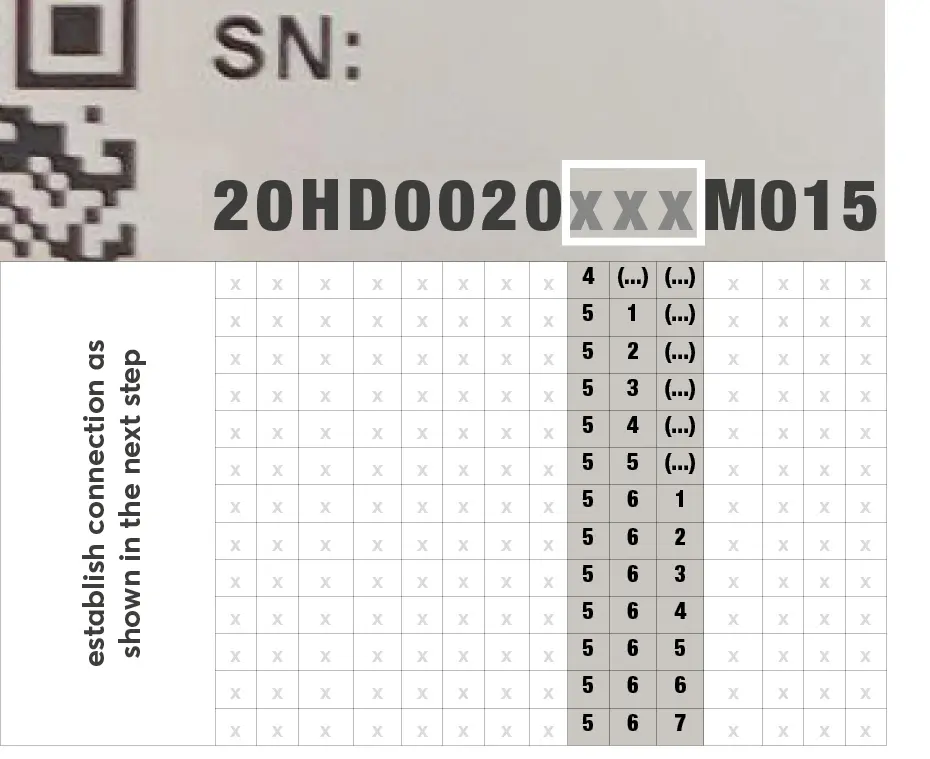
ATTENTION: The following step is only necessary if the serial number of the last inverter has one of the character combinations listed in the table in the 9th to 11th position. '(...)' can stand for letters and numbers.
Examples:
xxxxxxxx48Axxx --> Establish connection as shown in the next step
xxxxxxxx52Dxxx --> Establish connection as shown in the next step
xxxxxxxx57Jxxx --> Connection as shown in the next step does not need to be established
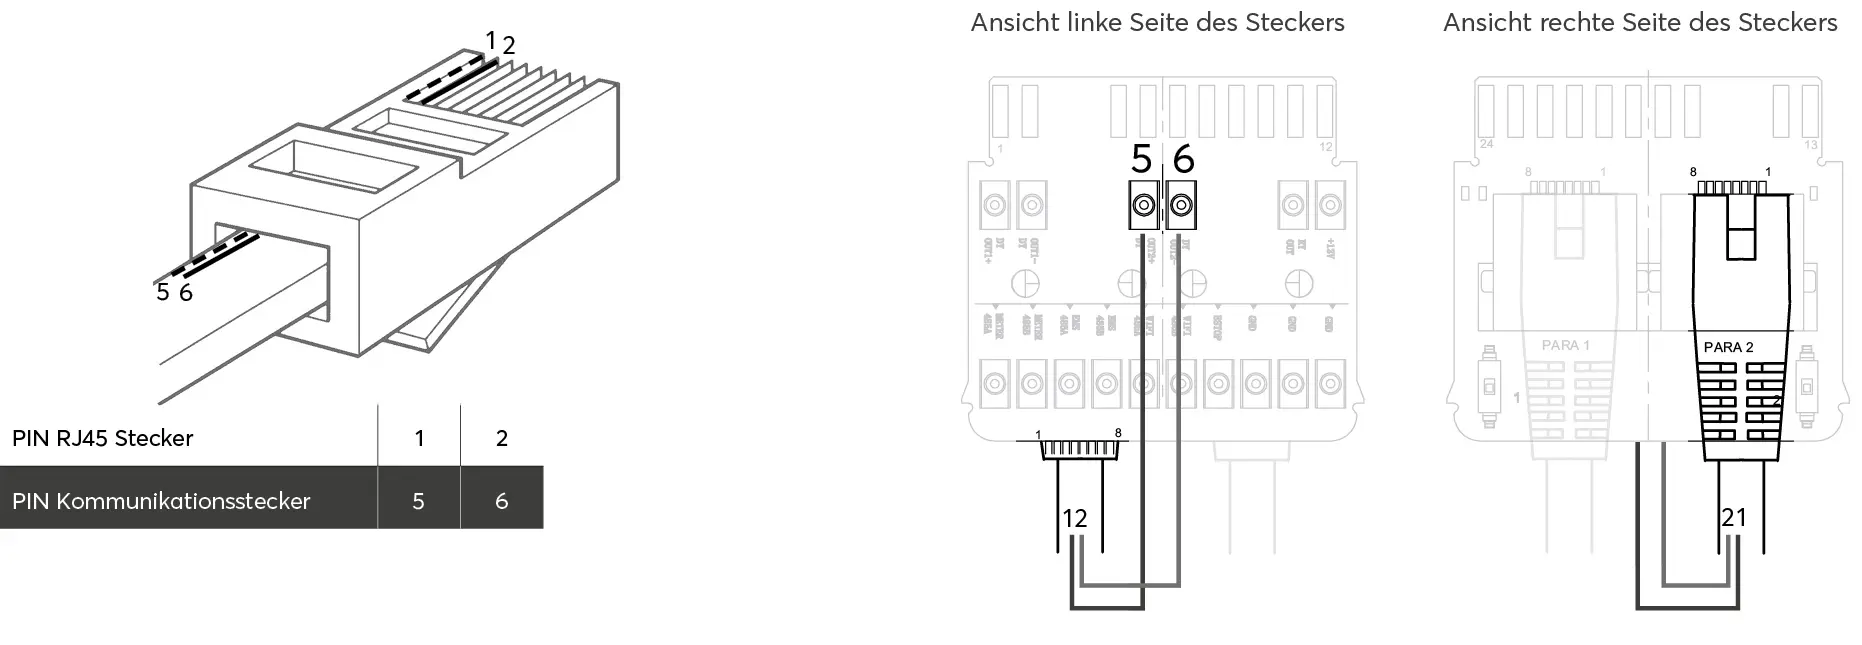
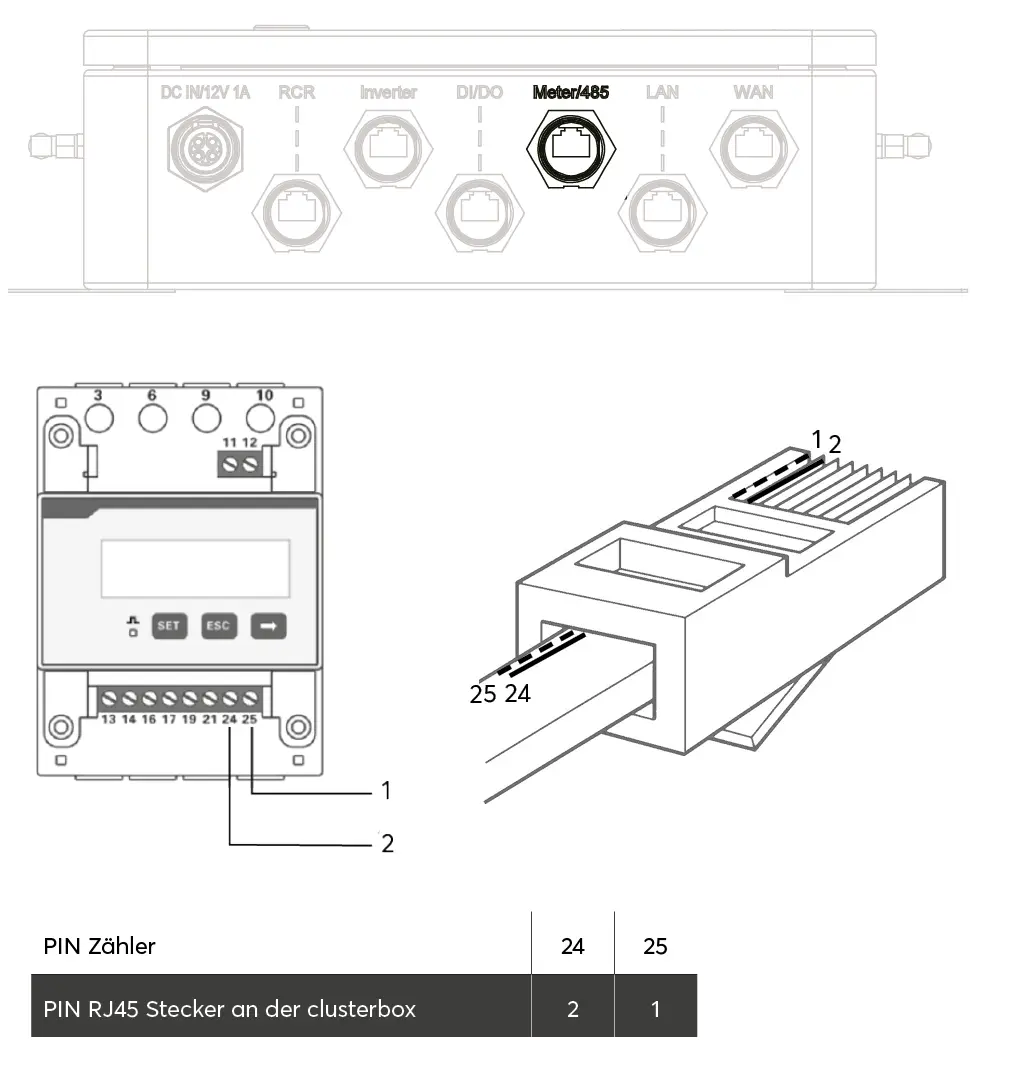
- Connect pin 1 and 2 of the last RJ45 connector to pin 5 or 6 of the communication connector
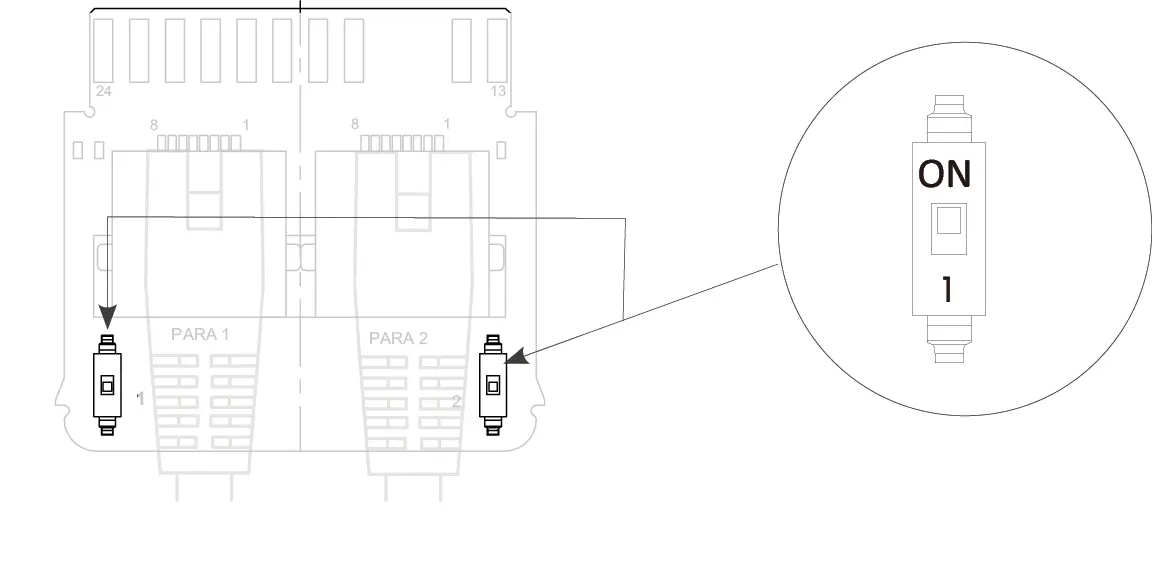
- Set the two DIP switches on the plug of the last inverter to ON
- Attach the waterproof RJ45 adapter
- Connect the meter to the cluster box
- Attach the waterproof RJ45 adapter
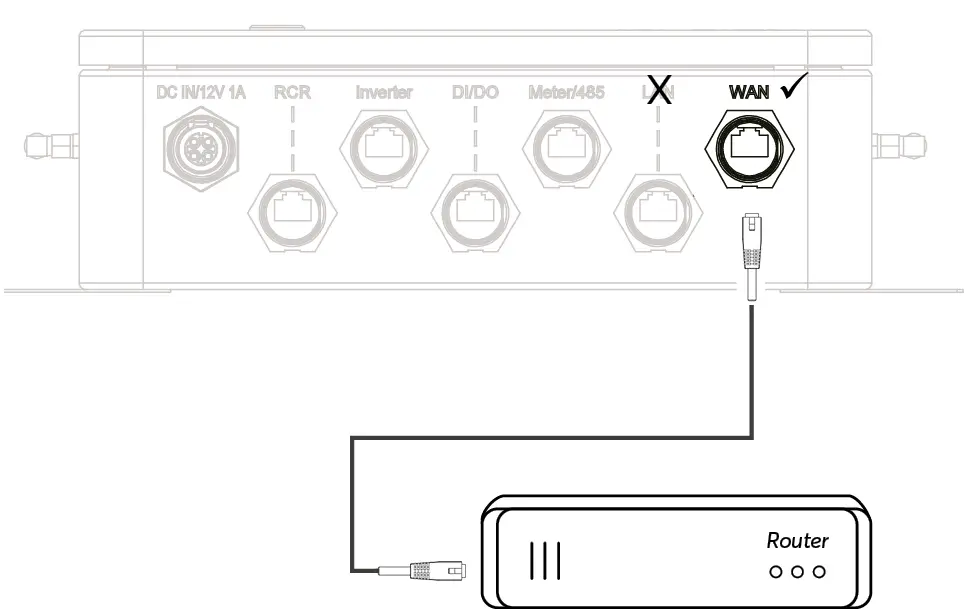
- Connect the cluster box to the router
Do not use the LAN socket. It is only intended for maintenance purposes!
In exceptional cases a Wi-Fi connection for a wireless connector can be established via the settings in the Clusterbox WebUI to a Wi-Fi network in the vicinity of the Clusterbox.
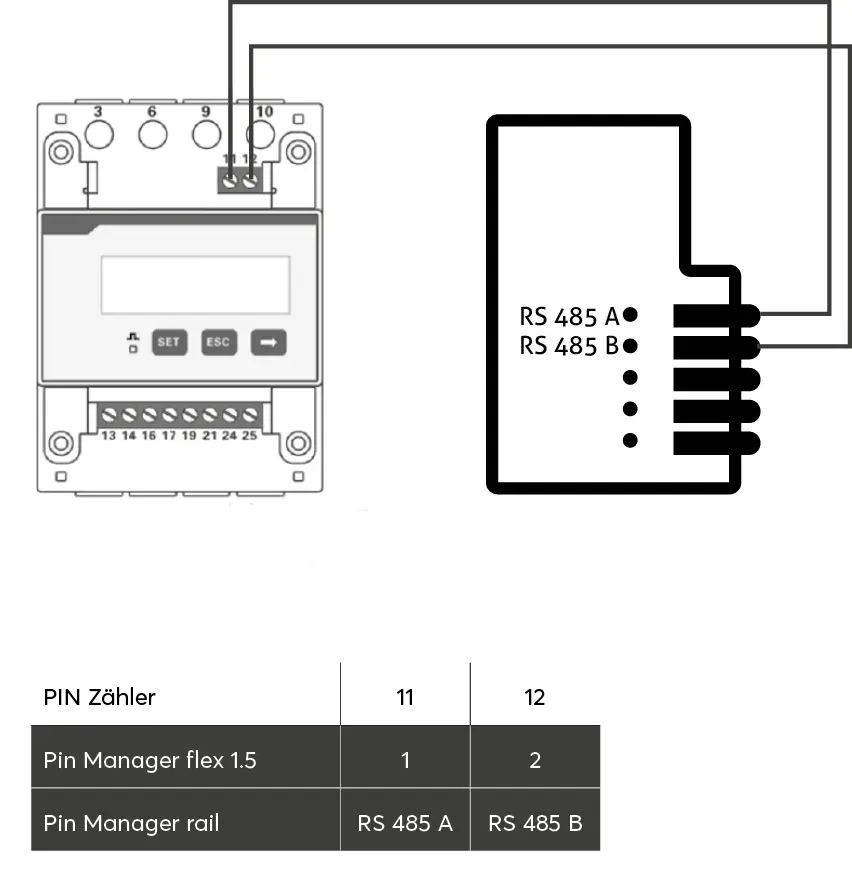
- Establishing a connector between meter and Manager
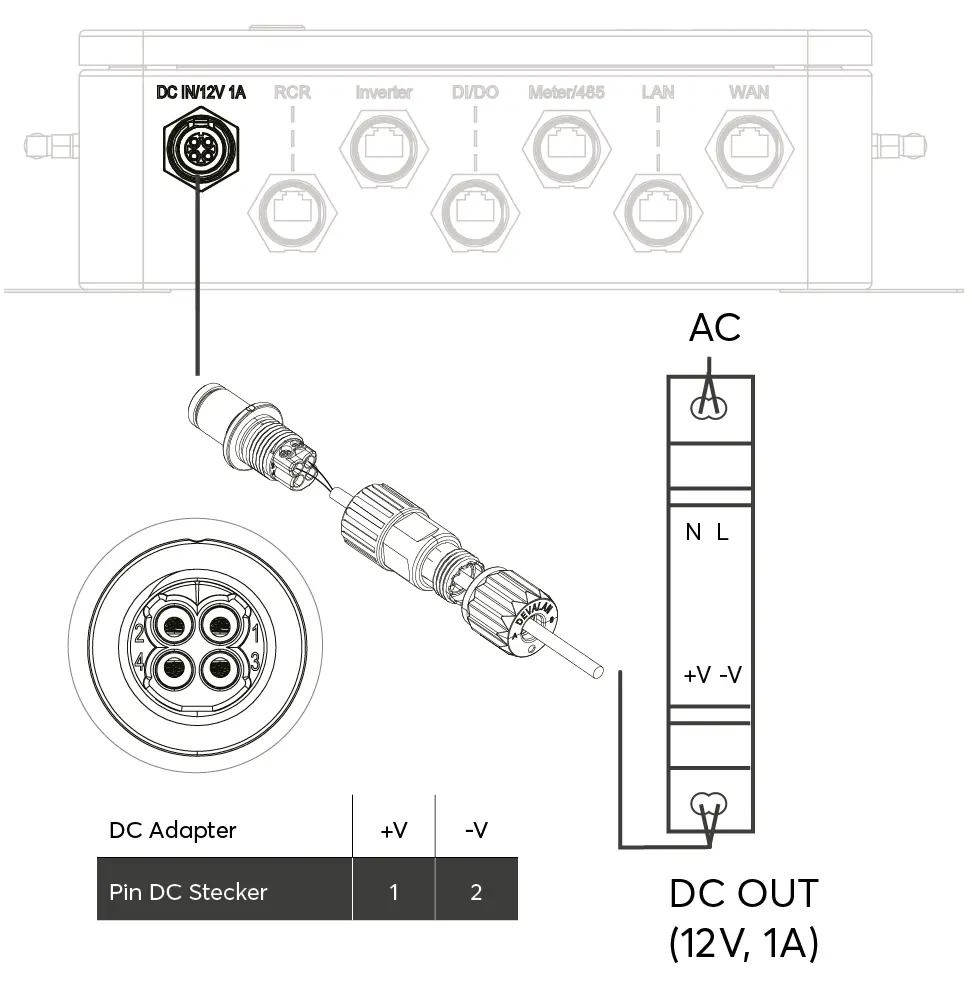
- Set up additional power supply
- Check that all devices are installed safely and reliably.
- Check that all cables are connected correctly, securely and reliably.
- Continue with the Commissioning the clusterbox