- SOLARWATT Battery & Inverter vision
- Installation
- Battery vision one backup booster
Battery vision one backup booster
This page describes the mounting and cable installation for SOLARWATT Battery vision one backup booster.
Observe all Safety Instructions and requirements for the installer.
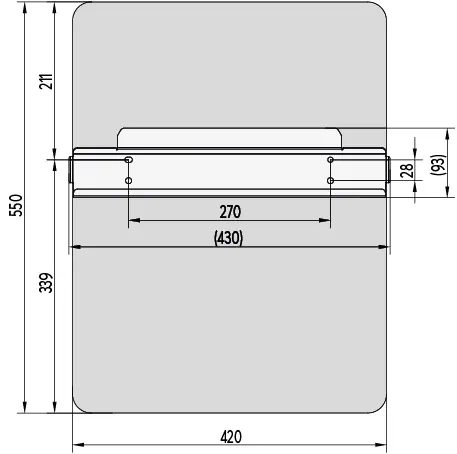
Observe the Specifications for the installation location and the maximum and minimum installation distances for the inverter, meter, battery, backup booster and clusterbox.
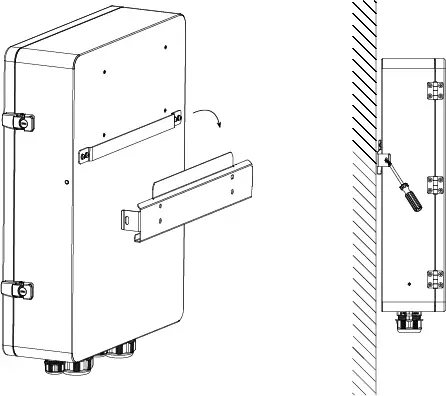
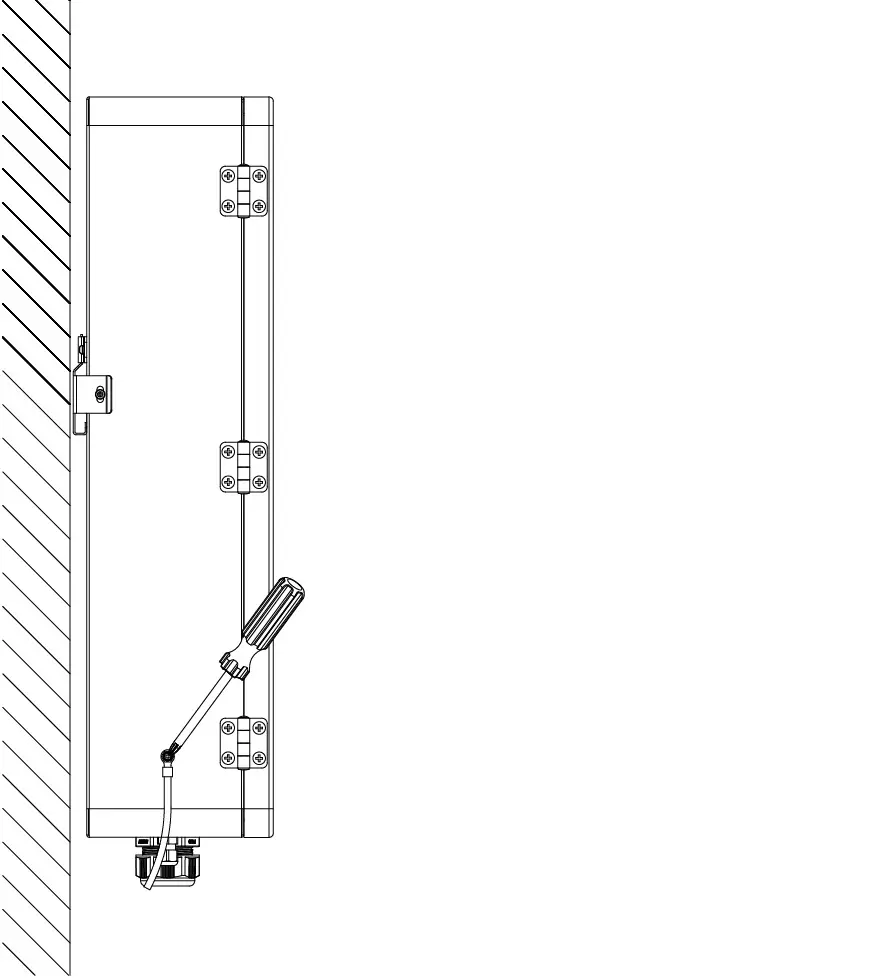
- Mount the wall bracket
- Attach and secure the backup booster
- Open the housing cover, loosen the cover plate screws, remove the cover plate

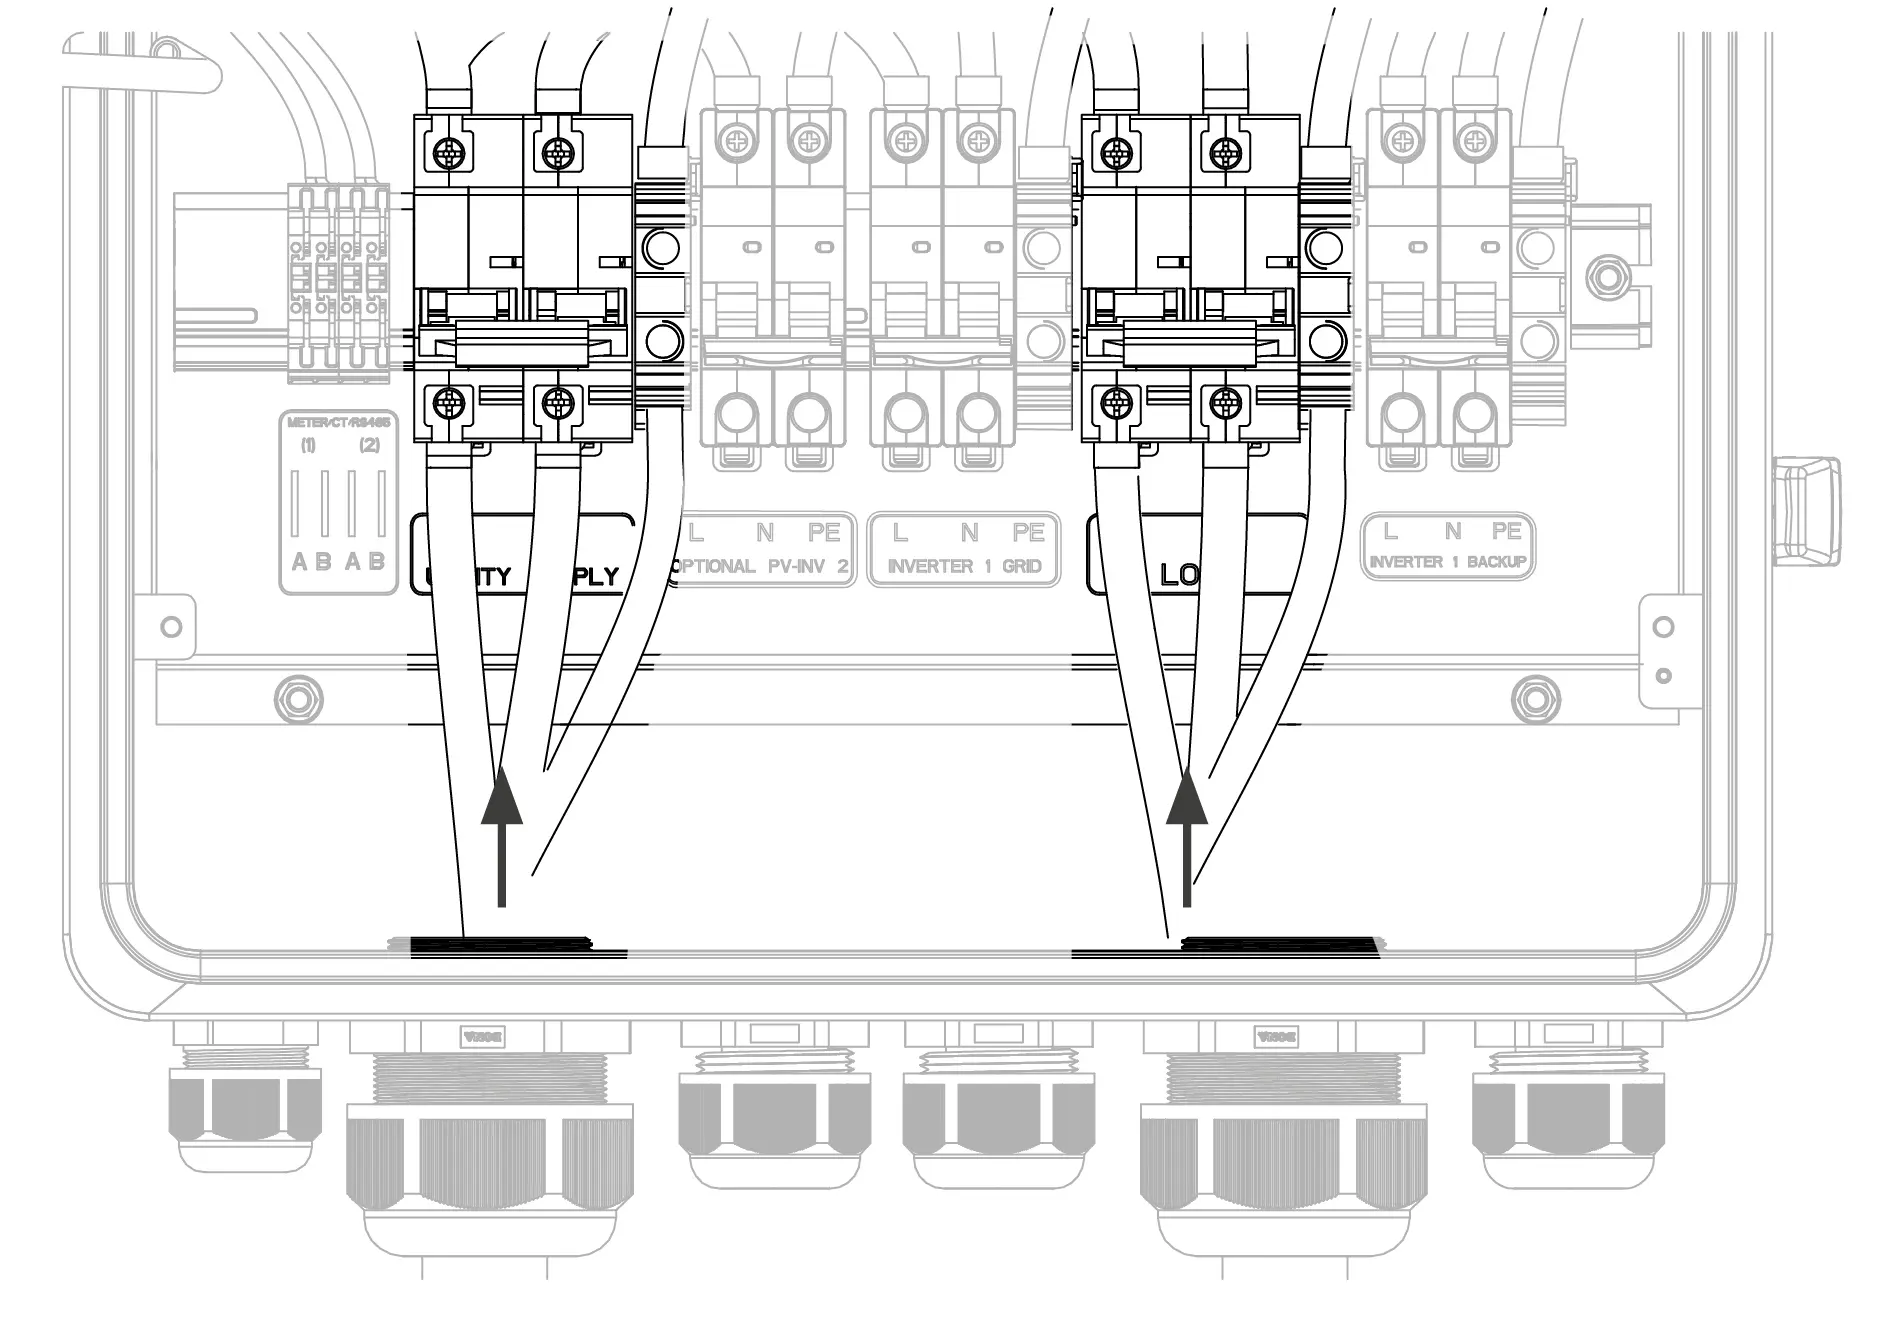
- Assemble the utility supply and household load connectors (using screw terminals)
Cable cross-section: 10-35 mm²
Outer cable diameter: 15-37 mm
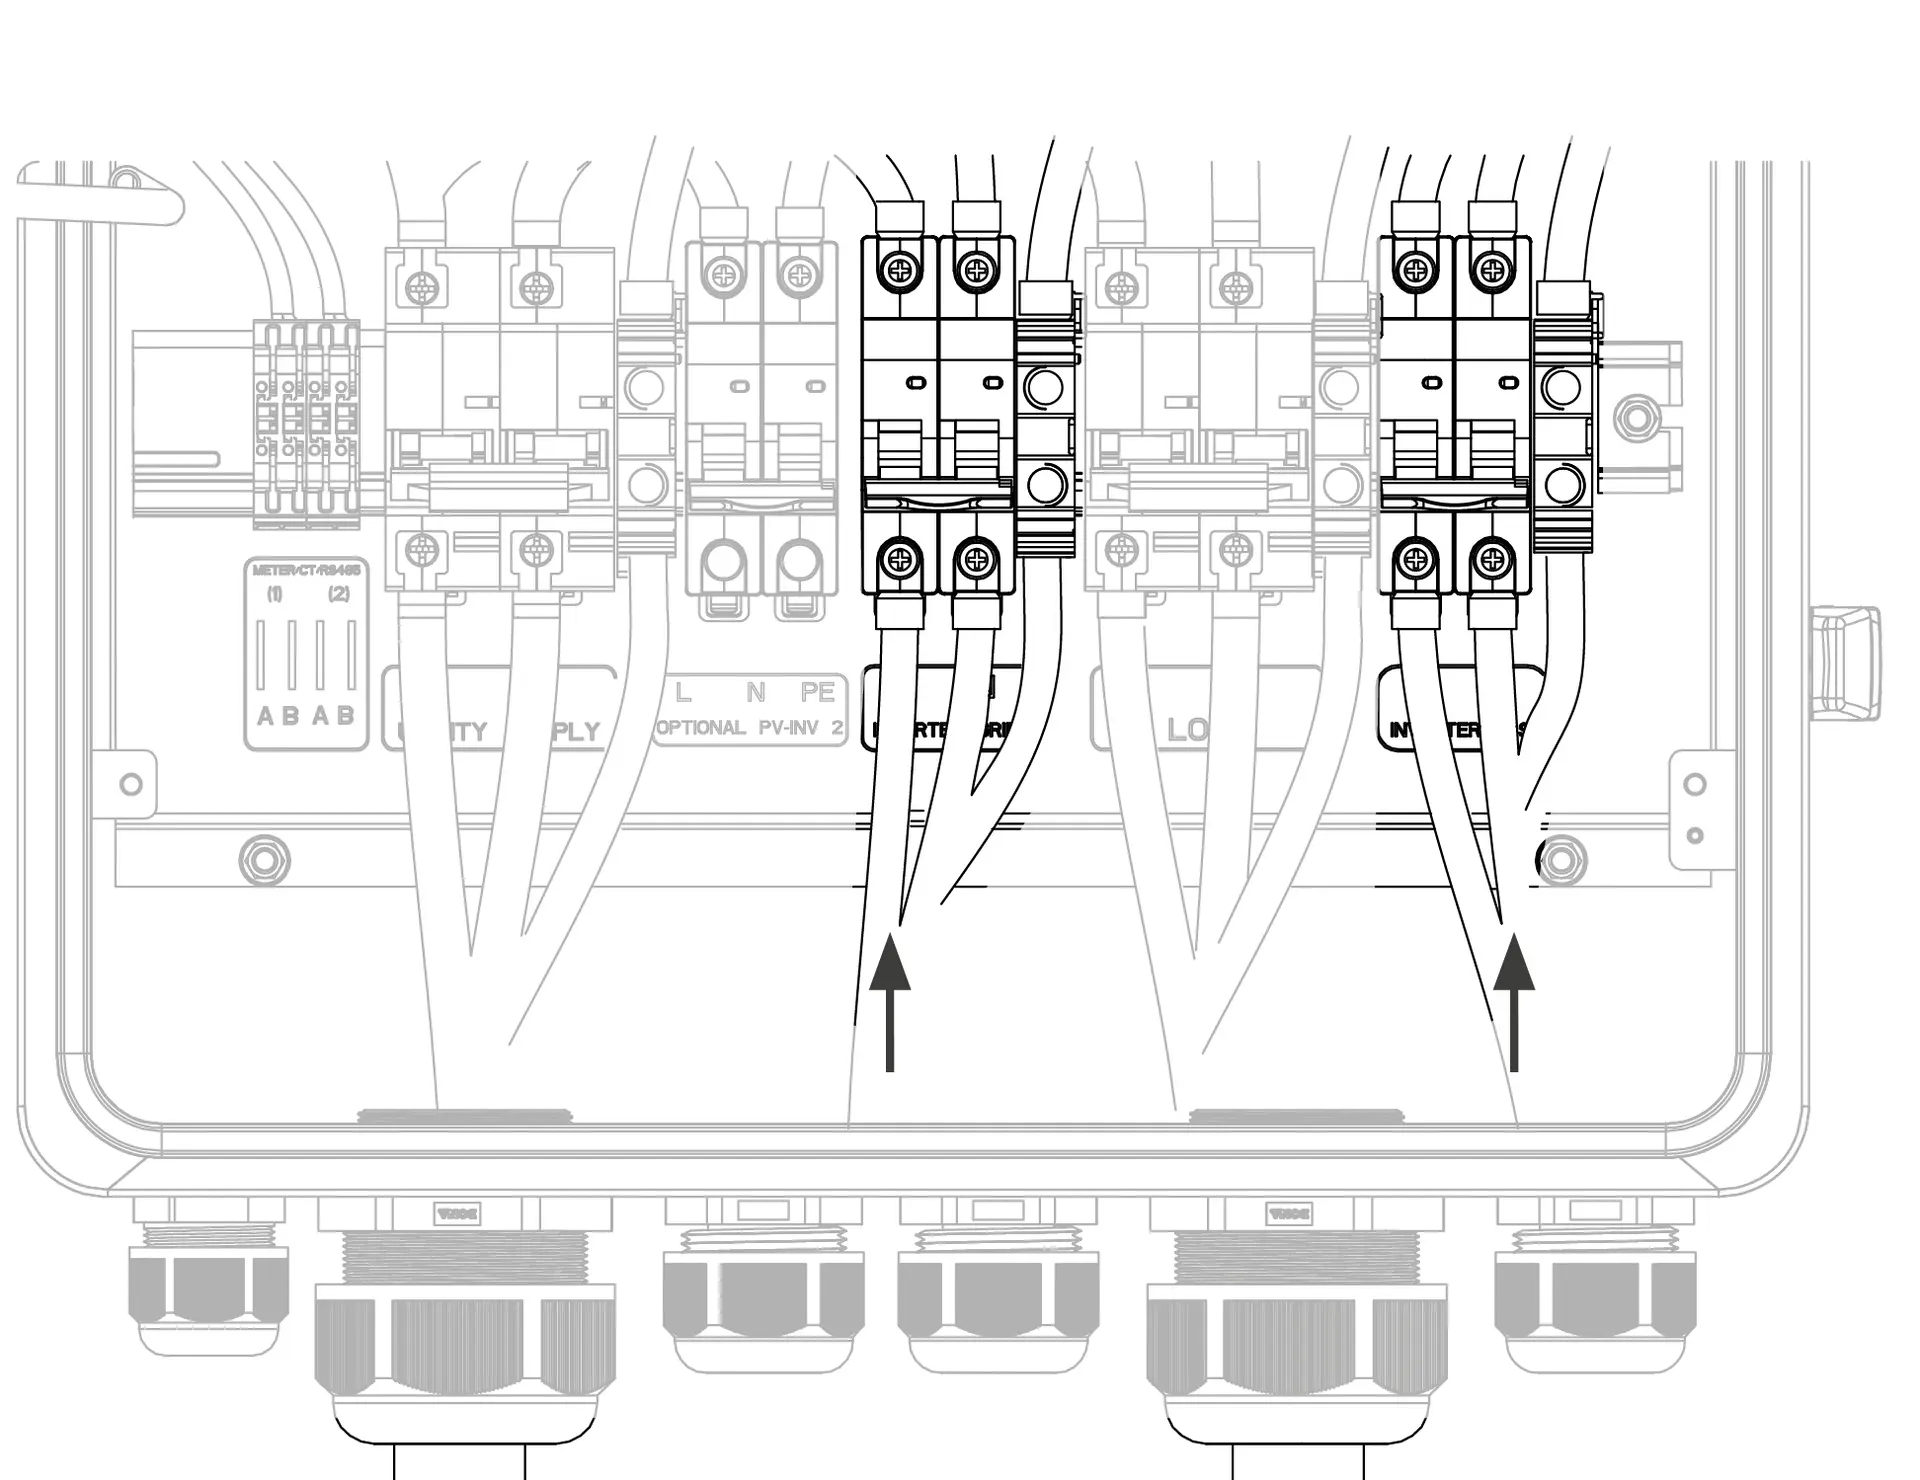
- Connect the AC grid and AC backup connectors to the inverter (via spring clamp)
Cable cross-section: 6-10 mm²
Outer cable diameter: 14-22 mm
Attention: Please also observe the maximum cable cross-sections at the inverter connection!
- Establish RS485 connection from the integrated meter to the inverter
Cable cross-section: 0.2-0.5 mm²
Outer cable diameter: 4-8 mm
Shielded cable with twisted wire pairs
The meter is already pre-installed in the Battery vision one backup booster; the meter included in the scope of delivery of the inverter is not required.
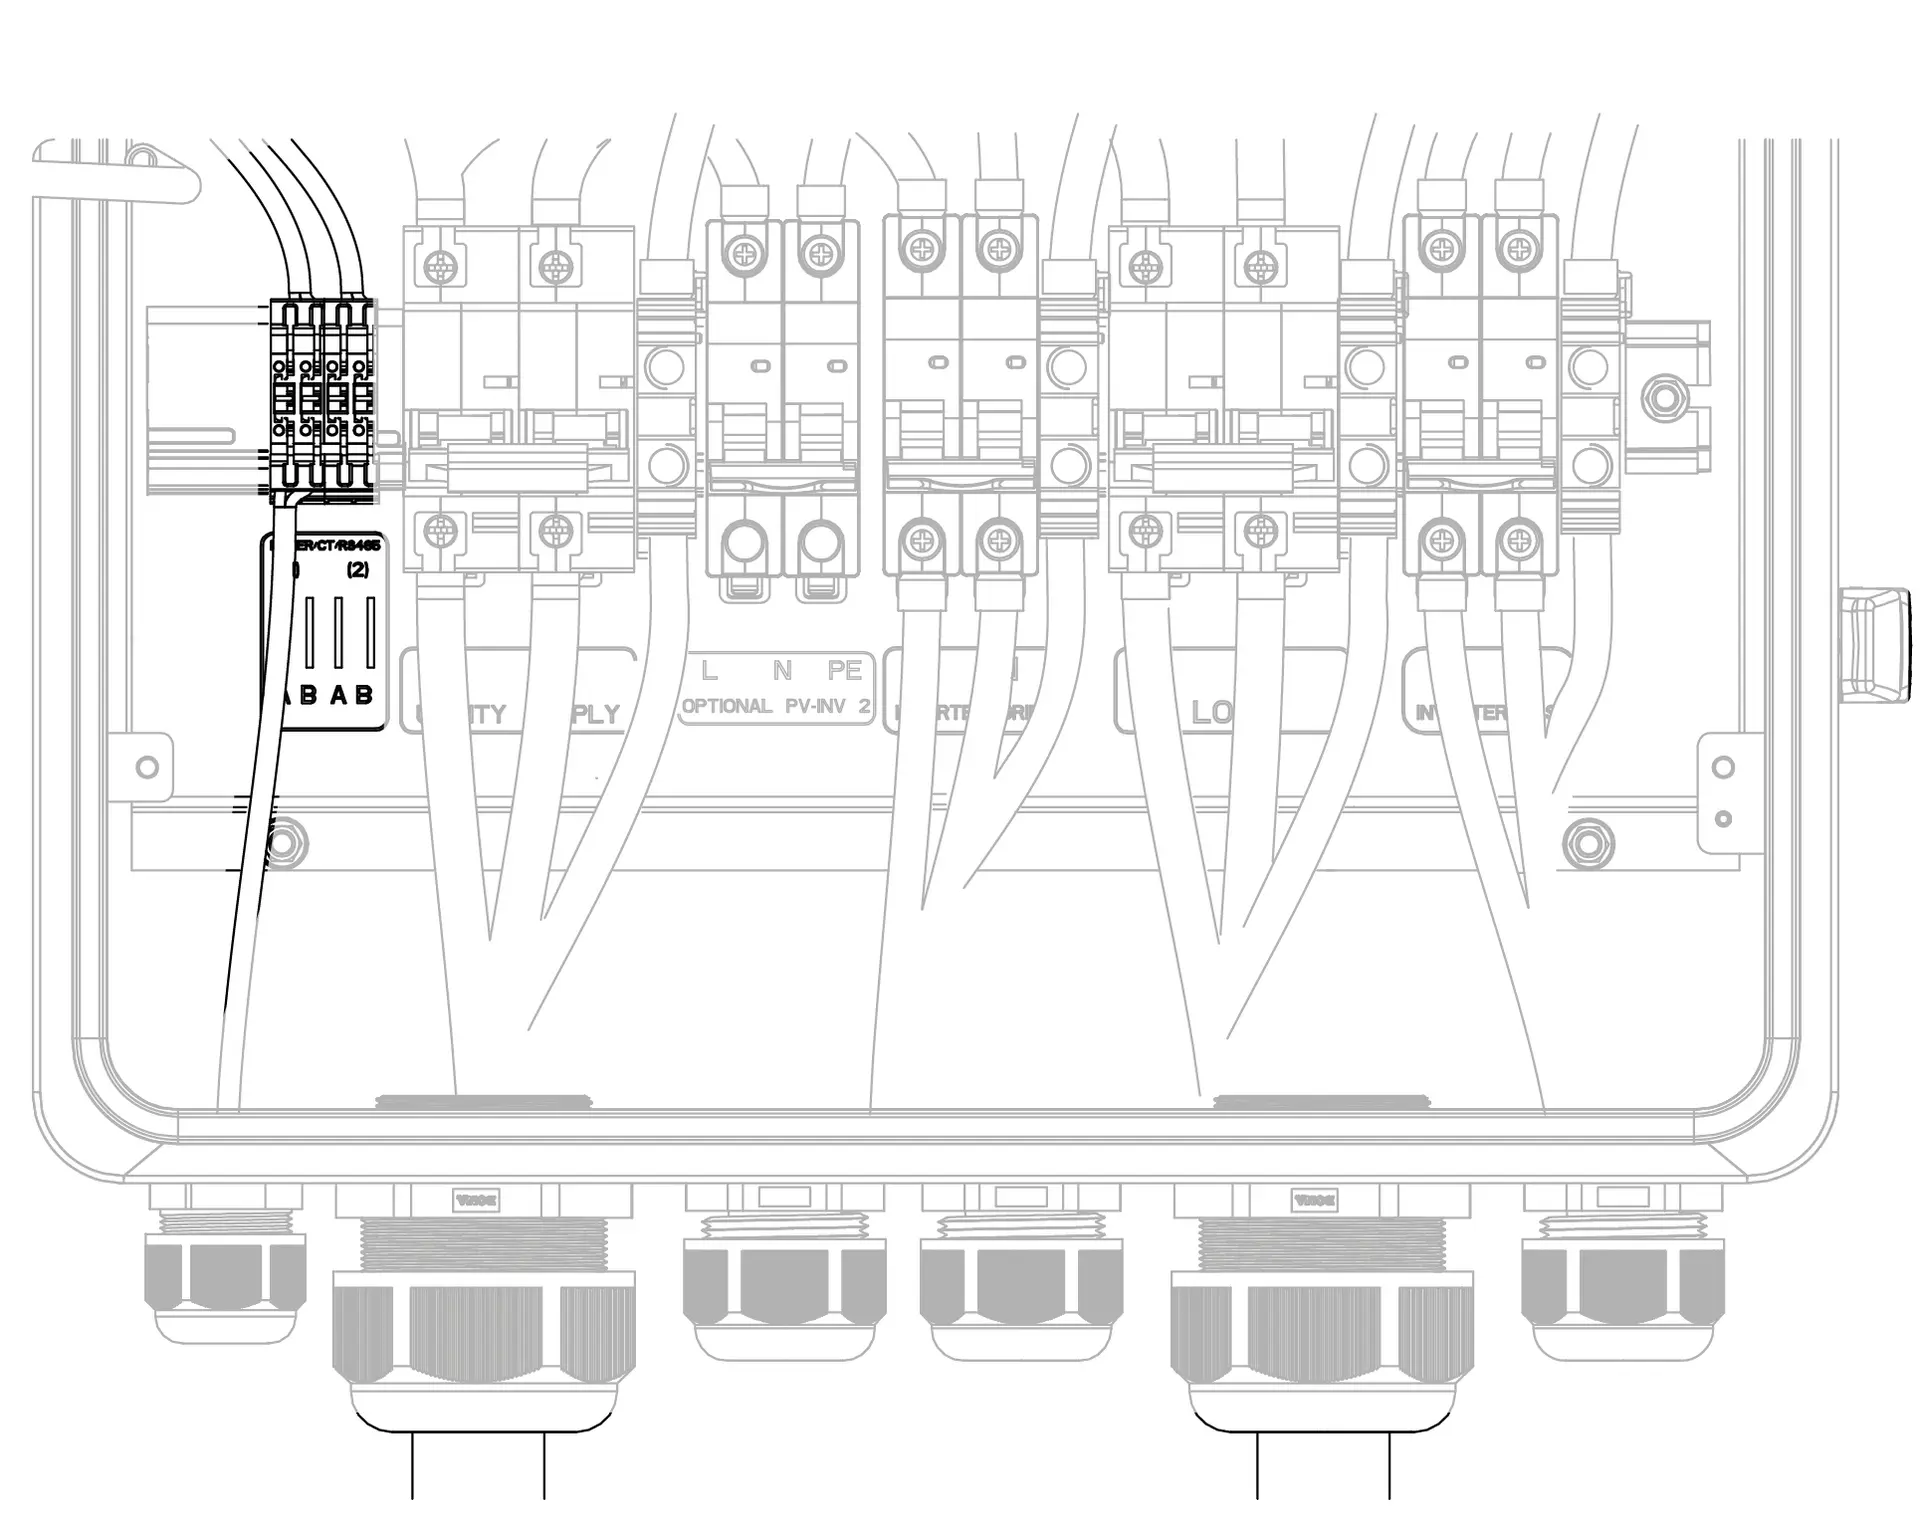
- Establish RS485 connection from the integrated meter to the inverter
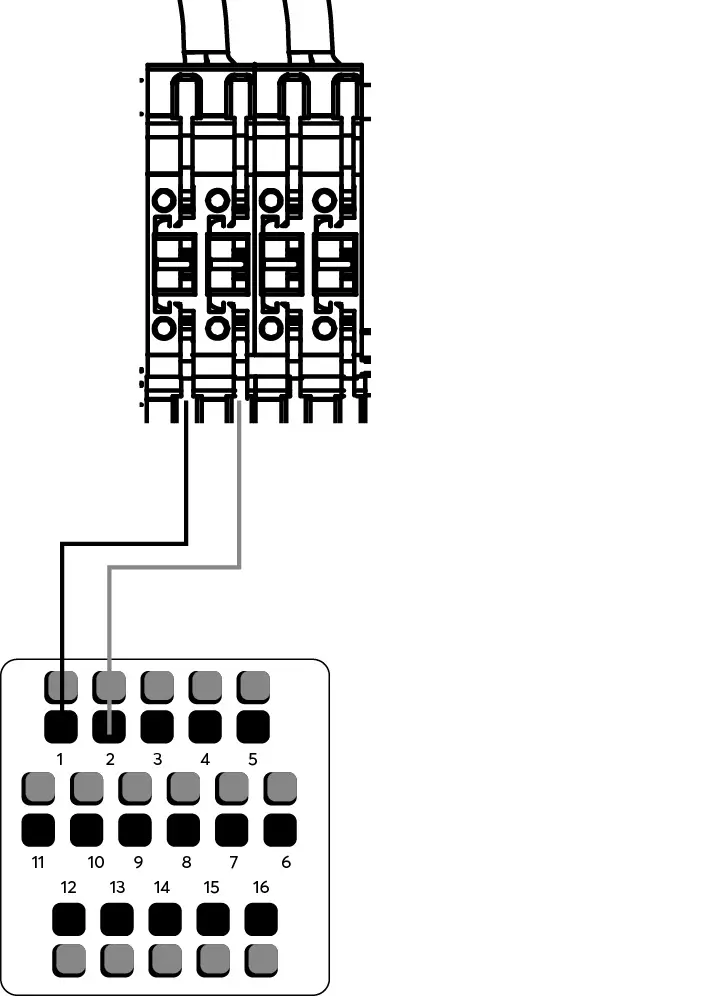
Connection side Plug
| Backup booster terminal | A | B | A | B |
| PIN of the integrated meter | 5 | 6 | 24 | 25 |
| PIN COM Inverter plug | 1 | 2 | optional e.g. Charger | optional e.g. Charger |
- Connect the grounding wire (M5, 2.0 Nm)
- Ensure that the appliance is securely and firmly installed.
- Make sure that the grounding cable is connected correctly, securely and safely.
- Make sure that all cables are connected correctly, securely and safely.
- Attach the cover plate, close the housing cover